PoE 2 1.0 Full Release Comprehensive Beginner's Guide - Everything Exiles Need to Know
Path of Exile 2 1.0 Full Release is coming soon. If you're starting fresh on launch day, reading this guide will save you dozens of hours of trial and error.
Currency farming in Path of Exile 2 Patch 0.5.5 is largely about creating the highest possible monster density without making your maps too slow or dangerous to complete. Breach is particularly effective because it produces large packs, numerous rare monsters, Breach-specific resources, and plenty of general loot. When combined with the Viridian Wildwood, it becomes an excellent strategy for players who have enough damage and survivability to clear empowered encounters quickly.
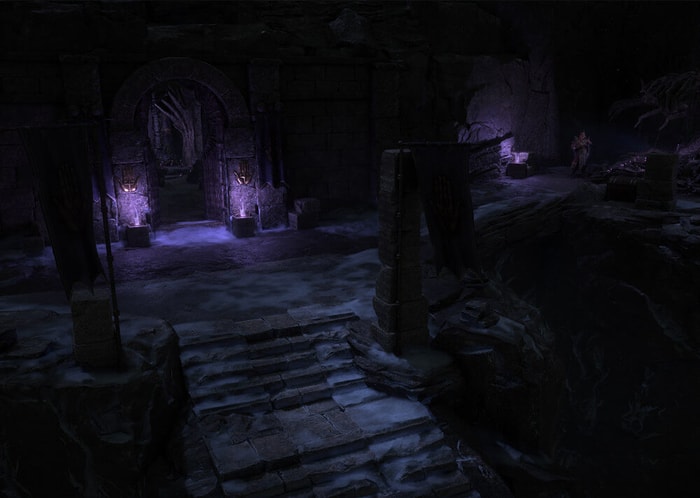
Breach naturally generates a high number of monsters in a relatively small area. More monsters give you more opportunities to obtain currency, valuable equipment, Breach Splinters, and other tradeable items. The mechanic becomes even stronger when rare monsters receive additional modifiers from Wildwood Wisps.
Patch 0.5.5 introduced Sacred Blooms as Ritual rewards. A Sacred Bloom can add the Viridian Wildwood to a cluster of maps on your Atlas. Inside the Wildwood, you collect Wisps that make monsters in the main map stronger and more rewarding. Sacred Blooms are exclusive to the Forbidden Rites event league.
The important interaction is simple: Breach creates many monsters, including rare enemies, while Wildwood Wisps empower those monsters. This gives you a powerful combination of density and reward scaling.
Before investing heavily in maps, make sure your character is suitable for the strategy. Breach rewards speed, area coverage, and the ability to fight while moving. A build with excellent single-target damage but weak clearing may struggle to keep the encounter under control.
Your build should ideally have:
Do not invest all your PoE 2 currency into maximum map difficulty immediately. Start with moderate investment, complete several maps, and observe whether you can clear Breaches without repeatedly dying. A completed medium-investment map is usually better than a heavily empowered map that consumes all your portals.
A Sacred Bloom affects the selected Atlas map and connected maps. Because of this, you should look for an uncompleted map with several useful connections before applying one. Guides for the strategy recommend maps with four connections when available, allowing one Sacred Bloom to empower a larger cluster. City maps are considered desirable, although they are not mandatory.
There are several restrictions to remember. Sacred Blooms cannot be used on maps that have already been completed, they cannot be applied to areas containing Delirium Fog, and they do not stack in your inventory.
Before using a Bloom:
This preparation reduces downtime and prevents you from wasting the Wildwood effect on poor layouts.
When you enter the map, complete the Viridian Wildwood first. Follow visible Wisp trails, eliminate monsters along the way, and collect as many Wisps as you reasonably can. Once you leave the Wildwood, the collected Wisps empower monsters in the main map, making them more difficult but more rewarding.
The Wisp colors provide different effects:
Yellow Wisps are especially useful for Breach because the mechanic generates many rare monsters. Adding modifiers to those rares increases their reward potential. Sacred Wisps are even more valuable because they combine multiple benefits.
Current strategy guides describe approximately 3,000 to 7,000 Wisps as a productive result from a good Wildwood run. Treat that as a flexible target rather than a requirement, since layouts and player performance can vary.
Do not spend excessive time chasing a small Wisp trail if doing so dramatically slows the map. More empowerment is useful, but profit per hour also depends on finishing maps consistently.
After leaving the Wildwood, move through the map and activate each Breach. Stay mobile, eliminate dense packs, and prioritize dangerous rare monsters. If the encounter allows you to stabilize the Breach, do so while maintaining enough space to avoid being surrounded.
Patch 0.5.5 changed some Breach behavior. The “of the Invasion” tablet modifier now provides one to two additional rare monsters instead of one to three. Unstable Breaches also release rare monsters in waves of five after stabilization rather than releasing them all simultaneously.
These changes make positioning important. Do not stand directly on the spawn point unless your build is exceptionally durable. Instead, keep moving around the encounter, clear each wave, and return toward the center when necessary.
One Atlas interaction also deserves attention: Reactive Hiveseeding can add Hives to nearby maps, but a map containing a Hive cannot generate an Unstable Breach. If your main goal is farming Unstable Breaches, plan this part of your Atlas carefully.
The best map is not automatically the map with the largest number of dangerous modifiers. You want modifiers your build can handle without losing clear speed.
Prioritize:
Avoid modifiers that severely reduce your damage, recovery, defenses, or movement. If one modifier makes a map take twice as long, the additional reward may not compensate for the lost time.
Open layouts are generally more comfortable because Breach monsters can spread outward. Narrow corridors, obstacles, and multiple elevation changes can reduce the number of enemies you reach before the encounter ends.
Do not measure profit only by counting Divine Orbs on the ground. Your total return may include:
The rebuilt Breach progression uses Splinters, Wombgifts, Breachstones, Breach Domains, and Hive-related content as part of its wider commercial loop.
Use a strict loot filter so you do not waste time collecting low-value equipment. Deposit loot quickly between maps and price items in batches. Bulk resources are often more convenient to trade than many tiny individual stacks, although actual market prices can change rapidly.
Keep a simple record of your investment and returns. Track the cost of maps, crafting currency, tablets, and other consumables. Then compare that cost with the value of everything you obtained. Run at least ten maps before judging the strategy, because a single lucky or unlucky map can create a misleading impression.
The complete strategy looks like this:
The secret is not to create the hardest possible map. It is to build a repeatable farming loop that combines Wildwood empowerment, Breach density, rapid clearing, disciplined looting, and efficient trading. Once your character can complete empowered Breaches without slowing down, the strategy can produce a large and consistent stream of currency.
Path of Exile 2 1.0 Full Release is coming soon. If you're starting fresh on launch day, reading this guide will save you dozens of hours of trial and error.

In this guide, we'll walk you through the registration process, explain how rewards are distributed, and answer the most important questions players have about the promotion.

The Forbidden Event in Path of Exile 2 is ruthless, unpredictable, and packed with deadly modifiers that can erase glass-cannon builds in seconds. Today I'm going to show five builds for those who like to stand still and never die.

Today MmoGah will show you Daniel’s helpful video about PoE 2 0.5.5 builds. I brought you top four builds for those who already got a lot of Divine Orbs and want to destroy the high-endgame without any effort. These four builds are: Thunder Stalker Mercenary Gemling Legionnaire, CoC Sparkomet Druid Oracle, Frost Reaper Druid Oracle, and Voltaic Nemesis Mercenary Gemling Legionnaire.