Welcome to our WotLK Ulduar full raid guide (All Bosses Normal and Hard Mode 25 Man). This raid is available starting with Phase 2 and offers 14 bosses & challenges! Your path through the raid will be mostly linear, with more areas becoming available as you progress. Today we will share 7 bosses: Flame Leviathan, Razorscale, Ignis, XT-002 Deconstructor, Assembly of Iron, Kologarn, and Auriaya.
Flame Leviathan
This boss is entirely fought in Vehicles, but that doesn't mean that your gear doesn't matter. All Vehicles are going to scale with your item level, so equip your highest item level for every single socket so that you're going in as powerful as you can.
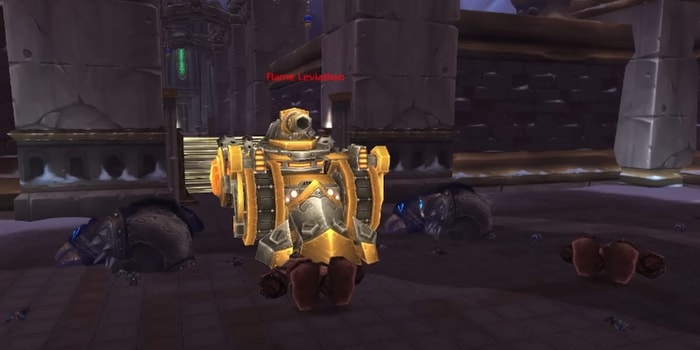
Now there are three types of Vehicles: Demolisher, Siege Engine, and Chopper. All three Vehicles will allow for both a driver and a passenger, and the amount of each type of Vehicle is limited.
I'm going to give you a rundown of the boss mechanics, so the way the fight goes down is that Flame Leviathan does not have a threat table like a typical boss. Instead, it's going to chase a Demolisher or a Siege Engine, which means Choppers don't get chased, move faster, and he's going to attempt to Ram it and anyone within ramming range if the flame Leviathan gets close enough, and it's going to deal great physical damage.
Over time, the Flame Leviathan will gain movement speed and move faster and Flame Vents. This is a high raid-wide damage ability that can be interrupted by the Siege Engine drivers, periodically doing raid-wide damage.
What is the strategy for simply this normal mode boss fight? Well, the Siege Engine driver is going to be using Ram to deal low damage and knock targets away. They also have a dash ability to move forward to escape danger, and most importantly, the Siege Engine Drivers are responsible for interrupting Flame Vents, and this can only be done at a short range.
A good strategy here is to have enough energy to interrupt flame vents, so as you're going on doing other abilities, make sure you have at least 30 energy, so you can interrupt those flame vents at any time because it's very important for the Siege Engine passenger you need to protect the siege engine with a large shield in case of danger, has a very long cooldown, so make sure you use it at a good time.
Most importantly, you are responsible for shooting down and flying targets that drop pyrite, and also, there will be mobs that are flying. You need to shoot them down, as well there are Anti-Air Rockets. There's no cooldown.
You'll probably run out of energy before anything else, but you just spam it and destroy anything that's flying. This is your most important job, and you can also do damage with Cannonballs but very low damage there.
Let's talk about the Chopper. It's faster than any other Vehicle and will not be chased by the boss. You can drop oil patches and light those oil patches on fire to do some AoE damage, and you can also heal any passenger to full health over four seconds. This is going to be relevant in hard mode but not in normal mode, so moving on to the Demolisher. Now the Demolisher shoots Cannonballs for low damage, but more importantly, it can shoot Liquid Pyrite, which costs 10% of the Vehicle's mana, and it deals low damage on impact but applies a large dot that Stacks up to times.
Razorscale
Now Razorscale is a skippable boss that does not have a hard mode. Start the fight, and ads are going to spawn. Just go ahead and kill them until all four harpoons are ready, so you can ground Razorscale and actually launch these harpoons at any time.
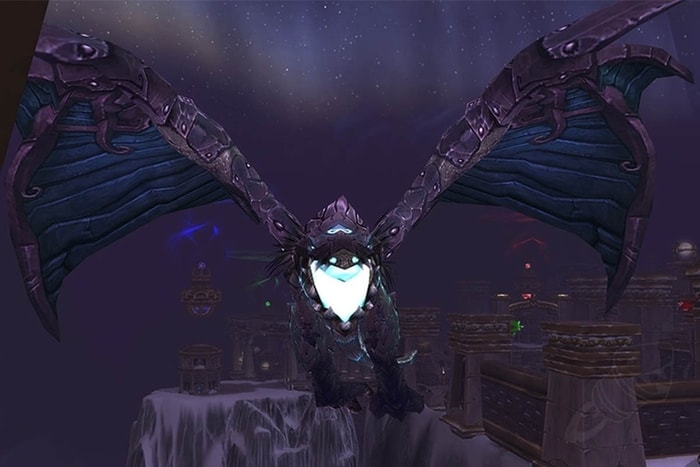
You don't have to wait until all four harpoons are ready. Now the kill priority for the ads is the Dark Rune Watcher. The Dark Rune Guardian and Dark Rune Sentinels.
The Dark Rune Watchers will no longer cast chain lightning, which you'll want to interrupt because it does quite a bit of damage and deals damage to five targets as it chains the Dark Rune Sentinels do a whirlwind ability, so you're going to tank them away from the raid so that Whirlwind doesn't do too much damage.
Once you finally get Razorscale down on the Ground with those four harpoons, you will want to pop lust. Healers can probably DPS just try to get Razorscale to percent Health as fast as possible to transition to phase 2.
Ignis
This is a skippable boss that does not have a hard mode. Ignis has a couple of abilities.
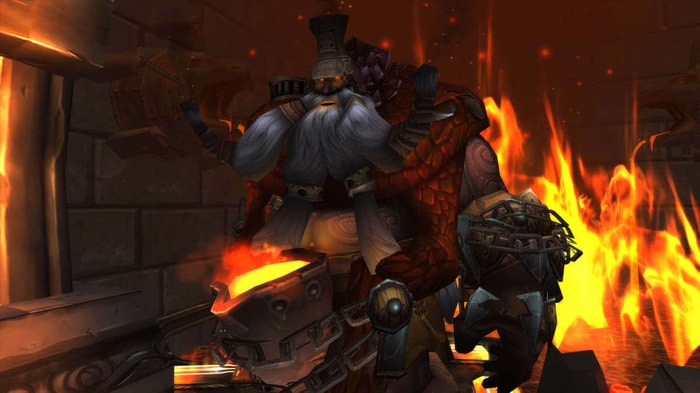
Scorch. This will deal damage in front of the tank, and it will leave burnt Ground where the tank is located, so no one stands in front of the boss, and the tank should move outside of the burning Ground.
Ignis is going to randomly grab a player and put them into his slag pot that the player can't move but can still do most actions like casting heals and will take massive amounts of fire damage over the duration, so healers need to focus on that player and keep them alive.
When it expires, the player is going to gain a ton of haste Hershey seconds to make up for their DPS loss Ignis also casts flame Jets, which is a high raid-wide damage ability that interrupts spell casting for eight seconds.
If you are casting a spell while flame Jets is cast, stop casting when flame Jets begins. Whether or not that's also the main part of the fight. Ignis is going to summon Iron Constructs. This is pretty much the main mechanic. Ignis deals additional damage for every Iron Construct alive, so you want to kill them.
However, Iron Constructs have a lot of health and they actually should not be DPS, instead you have to lead them to the Burning Ground that was created from Scorch, so the off tank is going to pick them up, bring them to the Scorched Ground and keep them there for seconds until they have stacks of heat, which turns them molten.
Now, most people recommend you drag the ad there, and then someone Roots it. If the off tank is good, they can hold them there without standing in the Scorched Earth themself. Once they have those stacks, you bring them to the water, and then the ads will become brittle. You need only to deal more than damage.
XT-002 Deconstructor
This boss has a hard mode and is unskippable periodically. He will cast searing light or a gravity bomb on random targets. If you get targeted by those abilities, you need to run out of the raid because it's going to cause AoE damage. Searing light will do AoE damage periodically immediately, so you don't want to be near other players during that, and the gravity bomb will not do damage until the very end, and it will also sort of suck players to that Target, who have been debuffed both these two abilities.
You want to run outside of the raid during a hard mode - searing light. When it finishes, it will spawn a life spark, which is an ad that will need to be picked up by the off-tank so as you run out of the raid after being targeted by a searing light on hard mode. You're going to kind of want to run towards the off tanks that can be more easily picked up.
|
DID YOU KNOW? If you are tired of beating bosses, you can purchase gold to strenthen your weapons, which is a wiser choice. |

Assembly of Iron (Steelbreaker, Molgeim, Brundir)
This is three bosses in one. You've got Steelbreaker, Belgium, and Brundir. You can kill them in that order: the biggest one - the medium - the smallest one. That is the normal difficulty, and you'll have normal loot; however, if you want to do hard mode, you can kill them in the order of Brundir – Steelbreaker – Belgium. That will give you the hard mode loot; when one boss dies, the remaining bosses get healed to health, so cleaving or doing any type of AoE abilities doesn't give you any benefit. When one boss dies, the remaining bosses will gain additional abilities and gain supercharge, which gives them a damage increase and additional abilities. When the second boss dies, the last boss will enter a unique phase with completely different abilities than before and then get an extra stack of supercharge.
Kologarn
This guy is a Giant Stone Monster with two arms and a body. Now I'm going to be referring to his right arm and left arm during this fight. Remember you're facing him right, so his right is your left. He's facing you right, so the main goal throughout this fight usually is to target the right arm throughout the fight.
Because each arm has different abilities, the right arm has a Stone grip, and that's important to DPS it. When it grabs someone and the left arm is going to cast Shockwave, which is just unavoidable raid-wide damage. He's going to grab three random players in the raid. They're going to get stunned, and it's going to deal like damage a second to the affected players until they're dead basically, or once the arm has sustained damage, they'll be let go, so basically, when someone gets grabbed go ahead and do tons of damage, but I think it's a great strategy to attack the arm throughout the fight. When the arm is destroyed, 50% of the arm's health is going to be dealt with himself. If you keep destroying the arms, color gems will be defeated.
Auriaya
This boss does not have a hard mode and has four ads during the fight. It is somewhat difficult. A hard part of this fight is the pull. Sanctum Sentries actually do quite a bit of damage right when the fight starts by using Savage Pounce, which does physical damage an additional every second for five seconds, so typically, the idea is to have the entire raid out of the line of sight from Aura and pull with a Hunter Misdirection or a Death Knight tank use Death and Decay.
Basically, you don't want to get hit by these ads when the fight starts. You want all of them on the tank, but this is going to cause extreme tank damage, so all cooldowns should be used right when the pull starts. A discipline Priest should use pain suppression tanks and all of their defensive cooldowns, and likely you might need to use the blessing of protection to save anyone who might have pulled the threat during this pull, popping all cooldowns to ensure the tank doesn't die.
When the fight starts, Rei is going to use an ability called Guardian swarm, which is very similar to Magnus Spiderlings summoning ads that die quickly and really don't make much of a difference. A big mechanic of the fight is the raid-wide fear, and this is called Terrifying Screech. Everyone is going to flee in horror for five seconds right when she uses fear. She's going to begin using Sentinel Blast if she completes this cast. She's going to channel it, which does a lot of AoE damage, which basically could potentially cause a raid wipe.
Want to learn other bosses' guides? You can watch Toyhouze's video. I hope it is helpful for you.
Related Link: