In this Lost Ark Vykas Gate 1 Legion guide, I will go over all the major mechanics and break down its normal patterns. Click here to get more guides on LoA.
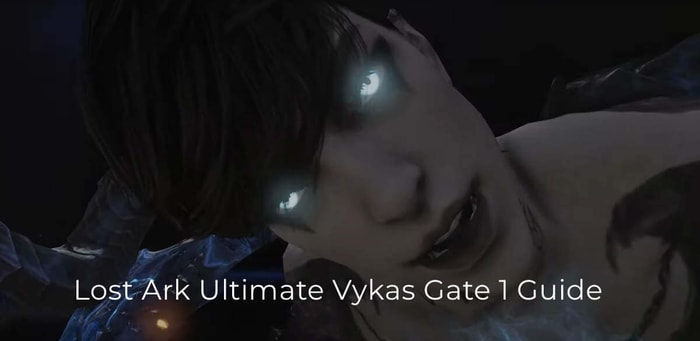
Vykas gate 1 will have two bosses: the incubus morph and the nightmarish morph. You can also call them the blue boss and the purple boss. When you first enter gate 1, you will be greeted by Incubus Morph. After attacking him for a while at around 54 bars, he will teleport to the middle. Then your party will be split to go against blue or purple bosses. You'll be performing special mechanics against the blue boss, and for the purple boss, you'll have to be inside the purple zone to be safe. Also, if both parties are balanced, it takes more time to lower the purple boss's Hp. So the sidereal skill the neva will be used on the purple side. Finally, when both bosses are 30 bars or less, the two parties will switch bosses. Let's dive into the blue boss's special mechanics.
Incubus Morphe Special Mechanics
Orbs to Gates
The first mechanic will start when the blue boss is around 49 bars. The blue boss will teleport to the middle, and there will be a white circle. Stay in this circle until the explosion, then get into your positions after the explosion. You can stand in times three plus one position and wait for your orbs to appear. When the orbs are summoned, you need to dribble them at the gates when they are the same color.
There are a couple of things to remember for this mechanic. The orb color order is always red, blue, green, white, and black. The colors will repeat only twice, and you must put it in the gate before the second circle ends.

For example, the orb will change colors in this order red, blue, green, white, black, red, blue, green, white, black, and then disappear. The color of the gates only has two different options. The gates at one o'clock and seven will only be red or green, and the gates at five and eleven will be only blue or white. The orbs at the top like to travel left, so you should stay on the left side. The orbs at the bottom like to travel right, so you should stay on the right side to get out of them. If two or more players fail this in the normal model, you can use a Time Stop Potion when the blue boss folds his wings. In hard mode, you cannot survive if two or more players fail this mechanic.
Blue Black Orbs
The second mechanic starts when the blue boss is at 37 bars. The boss teleports first, and it looks like he is gathering energy. Once the stagger check starts, you must throw your whirlwind grenade and spam your high stagger skill. If you complete the stagger check, a blue or black orb will be above your head. The players with the black orbs need to position themselves at one o'clock and seven o'clock, and the players with the blue orbs need to position themselves at eleven and five o'clock. Now there will be a set of circles lighting up on the ground. You need to memorize the order of the circles matching your orb color because that's where the orbs will be flying towards the boss from. You need to use your body to block the orbs so that the orbs don't reach the boss. If you fail this, you will need to restart the raid. If you are playing a slow class, now is a good time to use your swiftness Robe. After you succeed, there will be a safe zone around the boss or away from the boss. You need to tell the other party where the safe zone is, and the other party will have to stay in the safe zone to be safe.
Switch
Keep attacking the blue boss until he's at 30 bars, and if the purple boss is also at 30 bars, the two parties will switch. After the switch, you need to wait for the explosion. If you start with the purple boss, the blue boss will have around 30 bars left. If you bring him down to about 25 bars, he will teleport to the middle and start gathering energy. And you need to look for the white circle at this moment. Let the other party know which circle was white; the other party needs to be in that circle to be safe.
Blue Black Orbs
Keep pushing to around 12 bars, and the blue boss will make his stagger check and there will be blue or black orbs pattern again. Once you finish this, let the other party know if the inside is safe or not. After this, there are no more major mechanics. The purple boss has no mechanics, and you need to be at the safe zones where the other party will tell you.
Quick question
Q1: What color gate should I be prepared for?
Blue or white since you are at the 11 o'clock position.
Q2: Where should I be?
1 o'clock or 7 o'clock since you have the black orb
Normal Patterns
The blue boss's AoEs are red, and the purple boss's AoEs are purple. For the blue boss, you have to get out of the red indicators. But for the purple boss, you must be inside the purple indicators to be safe.
One-Two-Kick
The boss will perform a one-two punch, then finish his combo with a 270 kick. Stand behind the boss when he does his 1-2, then dodge the safe zone after you see the telegram of the danger zone.
One-Two-Cross
The boss will perform a one-two punch again but will end up with a cross attack making it dangerous to stay right behind him. The cross attack will follow if the boss glows when he does his 1-2.

Velganos Orb
This will only appear in the hard model. The boss will suddenly teleport to the middle, and there will be an AoE attack where the safe zone is right next to the boss. After the outside explodes, the boss will summon orbs that follow all the players. You need to get out of the safe zone so you won't absorb the orb in the middle. A puddle in the middle will hurt, so you need to avoid being in it. After you jump out of the safe zone, let the orb follow you towards the outside border of the map. When you think you have enough space, absorb the orb and run the velgano's pattern. If you successfully finish the circle, you'll gain a shield of light that will protect you from the final explosion.
Tips: use your space outwards right after the orbs appear. Run to the edge of the map. Before the orb touches you, walk towards it. Watch the whirlwind carefully because that is the direction of the safe zones. In this case, the whirlwind is spinning counterclockwise, so you'll have to run counterclockwise.
Get to the next platform after the explosions. A support alt shield can still negate the final explosion damage if you fail a mechanic. So make sure you go to support and show them that you didn't get the shield of light.
Dash
The boss will dash towards the Arggo. Then he will summon his clones, and the clones will disappear, leaving an "X" mark that will damage you. The blue boss summons his clones to his left and right, so don't be on his sides after he dashes. The purple boss summons his clones in front and behind him, so don't be in front or behind him after he dashes.
Kick dash
The boss will lift his leg before dashing. After the dash, the boss will turn towards the Aggro, and there will be a cone attack. For the blue boss, staying behind him will be the safe zone. For the purple boss, staying in front of him will be a safe zone.
Inside or outside
The boss will start pounding the ground, and rain will fall, which you need to dodge. After the rain stops, there will be a safe zone near or away from the boss. I recommend dodging the rain where this border would be so that it's easier to jump to the safe zone right after the rain stops. Once you see the boss pounding the ground, you can use your sidereal skill to hit the boss.
Lasers
The boss will gather energy with his hands, summon two clones, and shoot lasers. Then the boss will teleport to the Aggro, and there will be safe in-line shapes. After the line disappears, there will be one last cone attack. For the blue boss, I recommend getting behind the boss right after he teleports. You will have a very long DPS window. You need to stand in the purple lines for the purple boss because the cone-shaped safe zone will be in front of him. You can use the sidereal skill right after the boss teleports to hit his front back. The boss will gather energy with one hand, and then he will attack in a cone shape in front of him, which will then go through him and attack behind him as well. The blue boss will attack the Aggro twice in a row. But the purple boss will teleport to the Agro before he does this again. Get to his sides when he fixes his attack direction.
Donuts
The boss will levitate and draw these donuts on the ground. This will hurt a lot if you are not in the safe zone. Rain will fall on top of all the players, pushing you off track. You need to move around to dodge the rain. However, since four of you will be running around, your reign can block off someone else and push them off track. I recommend walking back and forth or just taking a few steps simultaneously so players won't overlap too much. The boss will soar. And after a few seconds, the boss will drop and do a lot of damage. For the blue boss's jump, you'll need to save your space and dodge the large circle. For the purple boss, you'll need to dodge three small circles, one mid-size circle, and then the final drop. Try to save your space when dodging the smaller circles for the last drop. The middle of the circle is a safe zone. You can look at the mini-map to see where the boss will be dropping.
Thorns
The boss will leave the thorn up. Get ready to follow one of the thorns right after the boss shoots the thorns out, follow a thorn and stay inside the cross-shaped safe zone. For the purple boss, just dodge the initial thorn, then stay inside the purple circle. Don't stress too much about dodging the thorns if you have support because the damage can quickly heal.
Quick question
Q1: 270 Kick or cross?
Cross. The boss is glowing
Q2: The boss just teleported to the middle. What should I prepare for?
Velganos orb
Q3: Where should I be?
Behind the boss
Hope the above content will help you master Vykas gate1.