How to play well as an Arcanist in The Elder Scrolls Online? In this guide, Ninja Pulls shows you the fundamentals that you should know when starting out an Arcanist character, including how the Crux works and how to play the Arcanist as a DPS, Healer, or Tank.
Make Use of the Crux
Crux is Arcanist's unique mechanic. Cruxes are small green triangles floating around your character. Some abilities generate Crux, and others consume it to become more powerful. You don't have to engage with this, but you should.
Generating Crux restores Magicka or Stamina, whichever is highest. Consuming Crux restores Ultimate, and doing either boosts your critical damage and critical healing. Those advantages are obtainable via passive skills like Hideous Clarity, Implacable Outcome, and Fated Fortune.
Meanwhile, Harnessed Quintessence boosts weapon and spell damage whenever you restore resources. Regen doesn't count. It has to be a resource-restoring event, like taking a synergy, the initial pop from a potion, or the Hideous Clarity passive being triggered.
The Cooldowns are also very forgiving, so you don't have to work very hard. Just keep the Crux coming and going regularly, and you will always have more damage, more crit, more sustain, and more Ultimate.
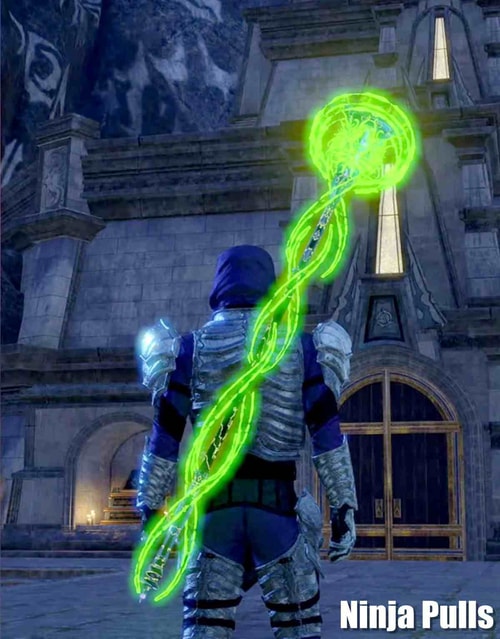
There are even better reasons. The Fatecarver beam lasts longer and ticks twice as hard when cast with three Crux. The beam can easily do 150K damage at zero stacks, and that damage amount can jump to 450K at three stacks.
Some passives, such as Healing Tides, give you some incentive to sit on your Crux stacks for extra mitigation or healing. That means supports can play a bit more tactically and wait for the right moment to spend their Crux, especially if the fight is predictable.
|
DID YOU KNOW? |

Utility Skills
Fatewoven Armor
It's important to get Major Resolve for extra resistance, and in this case, Fatewoven Armor is the one you need. Either morph of this skill works.
Runemend
The default self-heal is Runemend, which generates Crux and can be morphed into a heal over time. However, Runemend has two drawbacks.
Runemend's Drawbacks
Firstly, it scales to your offensive stats, not max health, meaning it's not very useful for Tanks.
Secondly, the cost is determined by your highest resource. A lot of Arcanist abilities have this feature. At first glance, it seems smart and useful. But ever since hybridization, you want a few abilities in the rotation that don't come out of your primary resource. Otherwise, sustain is tough. ZOS did give the Arcanist one ability whose cost is determined by one's lowest resource, which is good thinking, and the Arcanist sustain is generally pretty good. But these Dynamic costs can still get you into trouble if you are not careful. Keep that in mind, especially when reading tooltips. All costs are shown in Magicka by default, so the amount and the resource might change when you slot it.
Those are the caveats with Runemend. Although the skill has some drawbacks, it is still an awesome burst heal in situations where you need it.
Arcanist's Domain
Domain is the swirly green AoE that grants Minor Courage, Minor Fortitude, Minor Endurance, Minor Fortitude, and Minor Intellect. Getting all these buffs in one place is super valuable, and one of the morphs of this skill heals you.
Rune of the Colorless Pool
Rune of the Colorless Pool makes a similar case but for debuffs. Minor Vulnerability for 20 seconds isn't very unusual, but 20 seconds of Minor Brittle from a single cast is unprecedented. These two together are valuable enough, and the damage dealers might even want to run it if the debuffs aren't present in solo content.
Inspired Scholarship
The Inspired Scholarship skill
Inspired Scholarship is the buff that wraps your weapons in beautiful green markings. More importantly, it adds extra damage ticks to class abilities, generates free Crux, and grants permanent Major Brutality and Major Sorcery when slotted on either bar. Currently, this is the only ability in the game that can do that.
How to Play Arcanist as Different Roles
Arcanist Damage Dealer

Cephaliarch's Flail and Fatecarver combo
If you're making a damage dealer, it's recommended to treat the Arcanist like a one-trick pony, at least to start with. Spam the Cephaliarch's Flail on bosses and trash to build Crux, then fire the Fatecarver beam.
It's such a strong and easy combo that works everywhere and leaves you lots of bar space to level other things as you go. The Languid Eye Ultimate and Inspired Scholarship can go on the back bar.

Runeblades and Fatecarver combo
If your Magicka Arcanist can't sustain the Cephaliarch's Flail or you just want to use the Magicka morph – Tentacular Dread, you can use Runeblades instead for Crux building. You won't have anywhere near as much cleave damage, but I don't want to be prescriptive. There are various ways to make it work.
As for the back bar, an inferno staff with Wall of Elements is smart because Arcanists get a boost to status effects. But daggers and Quick Cloak is also good because the DoT lasts so long and lines up neatly with Inspired Scholarship, so you can just forget about it and keep cycling your front bar combo.

Inspired Scholarship, Cephaliarch's Flail, and Fatecarver combo
The combo will be very effective, especially once you can morph Tome-Bearer's Inspiration into Inspired Scholarship, which generates an extra Crux during the beam. In this way, you only need to cast two Cephaliarch's Flail to get back up to three Cruxes, and that means almost no downtime between beams.
There are more ways to deal damage as an Arcanist, and you should play around with different combos and morphs. But early on, it pays to keep things simple and use the shortest route to victory. That is why you should use the Fatecarver beam.
Arcanist Healer
In early game content, as long as you're placing Reconstructive Domain under the group, Rune of the Colorless Pool on bosses, and keeping up your Combat Prayer, your work is pretty much done. That's already a lot of juicy buffs and debuffs, plus Minor Evasion for the group from the Circumvented Fate passive.
Fulminating Rune is also handy in dungeons, since all three teammates can take the synergy. It hits hard, so if you drop it in trash, the adds are stuck tight, and everyone hits the synergy, you can get several hundred thousand damage from a single cast. Synergies aren't such a big deal until people have Undaunted Command unlocked. But it's good practice.
Another thing you can practice is the Healer version of the DPS combo:

Chakram of Destiny and Remedy Cascade combo
Build up three Cruxes with Chakram of Destiny, then fire Remedy Cascade to consume the Cruxes. This way, you will pump out crazy heals and resources for your group.
The heal itself will probably be wasted in normal dungeons or Overland content. It will also probably be wasted in 90% of veteran content. But it's good practice.
There's also a passive called Healing Tides which increases your healing done by 3% for each active Crux. So feel free to sit at three stacks and enjoy the 9% more healing done from all your HoTs, and just fire Cascade when your group needs a top-up.
If your group is stomping through everything at warp speed, you can build up Crux with Runeblades instead of Chakram Shields for a bit of damage. You can drop the heals and go full DPS. The choice is yours.
You can also choose between the Glyphic Ultimate, a damage Ultimate, or the War Horn if you have it.
Arcanist Tank
Arcanist Tanking is a bit different. There's no instant burst heal like Polar Wind or Coagulating Blood. Instead, you get easy access to resistances and mitigation, fat shields, and burst heals that can be triggered, so long as you think ahead. This might throw some people off at first, but once you get used to it, it's really strong, allowing you to survive and sustain most things with little effort.
In the most punishing content, it's harder to preempt all the boss's moves. But if you just want to practice the basics whilst leveling, your Crux mini game loop revolves around Impervious Runeward. Impervious Runeward grants a double shield: a 15K shield for 5 seconds and a massive 25K shield that lasts for just 1 second. If you time it right, you can just negate a lot of boss attacks. But if you cast Impervious Runeward with Crux, it also heals you for about 5K per Crux consumed. Therefore, at a basic level, the trick is to reach three stacks as quickly as you can, then spend it for a heal when you need it.

Chakram of Destiny and Impervious Runeward combo
You can use Runic Jolt to generate Crux with every taunt and Cruxweaver Armor for a free Crux every 5 seconds. If you don't have a Healer and want to create shields for your group, you can replace Runic Jolt and Cruxweaver Armor with Chakram of Destiny.

Runic Sunder, Cruxweaver Armor, and Impervious Runeward combo
The combo of Runic Sunder and Cruxweaver Armor also works great. With Runic Sunder slotted, you take 2% less damage per active Crux, which lets you stack the damage mitigation. When you need an instant burst heal, you can always hit the Impervious Runeward with just one or two stacks, then fire off a couple of taunts while the shield lasts to get back up to three.
Beyond that, what you slot depends on whether you've got an Arcanist Healer taking care of Domain and the Rune of the Colorless Pool. If not, then that's your job.
Runeguard of Still Waters is also recommended for group Minor Protection and a free 12K heal if your health is below 50%. Blockade of Frost with a Crusher enchantment is sort of a given. And you can obtain Major Breach either from Pierce Armor, Razor Caltrops, or Elemental Susceptibility.
As for the Ultimate skills, you can slot Gibbering Shield on the front bar so that you can have access to the effect of the Wellspring of The Abyss passive. On the back bar, you can slot Vitalizing Glyphic, War Horn, or just a damage out of some kind.
Bonus Tips
1. Don't forget to slot your Champion Points as soon as you've made your character. They're not as transformative as they used to be, but every little helps.
2. The Fatecarver beam is an AoE DoT, so Arcanist damage dealers should slot Biting Aura and Thaumaturge.
3. If you've been collecting Intricate gear, here's a reminder of roughly how many bits are needed to max out each crafting skill.
Intricate Items Needed for Level 50
Blacksmithing 130
Clothing 140
Jewelry 200
Woodworking 100
4. If you've been hoarding Master Enchanting Writs, you can get your Arcanist to 50 instantly by pre-crafting 200 superb, purple Glyphs for them to deconstruct. Just use whatever green Runestone is the most plentiful or least useful to you.
If you found this video helpful, please Like it and subscribe to Ninja Pulls's channel for more future content.
YOU MAY ALSO LIKE:
Best Ways to Get Skill Points for Your Arcanist