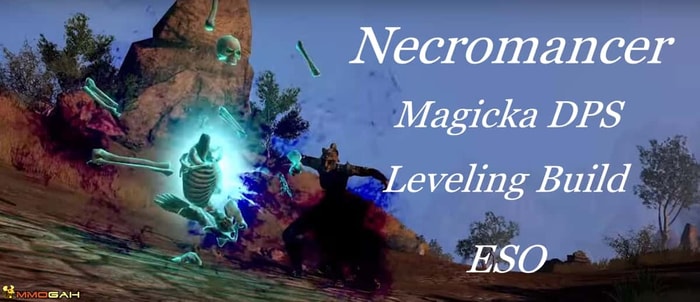
Necromancer is the newest class introduced in the Elsweyr update. (If you only have access to the base game, you can buy Necromancer in ESO Crown Store or use your gold to buy this class from other players.) This class focuses on damage dealing, and many abilities have Magicka and Stamina morphs available to suit different playstyles. This build is intended to act as a framework for you to follow.

Necromancy, though, is still shunned by some in Tamriel, so be careful when using certain skills around Justice NPCs or you'll receive a bounty and become attack on site (the abilities that will cause this to happen are marked in their tooltip). When built correctly, easy and effective builds can be made, making the leveling process even easier. There is also and cheap ESO Power Leveling service that allows you to skip the grind and jump into your favorite part in the game.
Race
·High Elf
·Breton
·Dark Elf
·Khajiit
Gear
·5 light
·1 medium
·1 heavy
·Destruction Staffs (Dual) OR Destro/SnB or Resto for PvP
Note that the gear weight spread is a recommendation, not a strict rule for leveling. If you get better pieces as you level, feel free to replace them (just try to have more of the main gear weigh than the others).
Attributes: All in magicka
Vampire vs Werewolf vs Mortal
Vampire or Mortal: Vampire is great for the extra magicka recovery if you need it but can leave you very squishy to fire, especially in PvP. If you feel like your build could use an additional 10% magicka recovery from the vampirism passives, then you can pick up vampirism. If you feel your sustain is fine or PvP is your main priority, you may want to choose to remain mortal.
Mundus: Apprentice
Potions and Food
Potions: Magicka
Food: Not mandatory, but if you can find some, try to get stuff that increases either your health, magicka, and/or magicka recovery.
Abilities
You'll want to do your best to have one ability from each class tree on both your front and back bar. When you get XP, whether it be from killing monsters or quests, the abilities on your active bar are the ones that get XP as well as their respective skill lines.
If you have abilities on a skill bar you want to level up, you can switch to that bar when handing in a quest or completing a dungeon to give them and their skill lines a surge of experience. You will notice I frequently recommend the first skill of a skill tree as a choice just to help you start getting that skill line leveled. If you want to level another weapon or skill tree without using that weapon or skill, simply placing a skill from that tree on your ability bar helps it get XP when you gain experience on that bar. You don't have to use it!
Abilities - PvE
·Bone Tyrant ->  Death Scythe ->
  Hungry Scythe
·Grave Lord ->  Flame Skull ->
  Ricochet Skull
·Grave Lord ->  Blastbones ->
  Stalking Blastbones
·Grave Lord ->  Boneyard ->
  Avid Boneyard
·Grave Lord ->  Skeletal Mage ->
  Skeletal Arcanist
·Grave Lord ->  Shocking Siphon ->
  Mystic Siphon
·Living Death ->  Render Flesh ->
  Resistant Flesh
·Mage's Guild ->  Magelight->
  Inner Light
·Fighter's Guild ->  Trap Beast ->
  Rearming Trap
·Light Armor ->  Annulment ->
  Harness Magicka
·Destruction Staff ->  Force Shock ->
  Force Pulse
·Destruction Staff ->  Wall of Elements ->
  Elemental Blockade
·Destruction Staff ->  Weakness to Elements ->
  Elemental Drain
·Psijic Order ->  Accelerate ->
  Channeled Acceleration (Race Against Time if you PvP)
·Additional abilities for PvP Include:
·Living Death ->  Expunge -> Either Morph
·Living Death ->  Spirit Mender ->
  Spirit Guardian
·Living Death ->  Restoring Tether ->
  Mortal Coil
·Bone Tyrant ->  Bone Armor ->
  Summoner's Armor
·Bone Tyrant ->  Bitter Harvest -> Either Morph
·Destruction Staff ->  Destructive Touch -> Either Morph
·Restoration Staff ->  Steadfast Ward ->
  Healing Ward
·Mage's Guild ->  Entropy ->
  Degeneration
Ultimates
Grave Lord ->  Frozen Colossus ->
  Glacial Colossus
Mage's Guild ->  Meteor ->
  Shooting Star
Restoration Staff ->  Panacea -> Either Morph
One-Handed and Shield ->  Shield Wall ->
  Spell Wall
Living Death ->  Reanimate ->
  Animate Blastbones
Passives
·Bone Tyrant
·Grave Lord
·Living Death
·Racial
·Light Armor
·Destruction Staff
·Optional: Restoration Staff or 1h and Shield passives for PvP
·Vampirism Passives (except Savage feeding and blood ritual)
·Alchemy – Medicinal Use
·Mages Guild
·Fighter's Guild – Banish the Wicked
·Undaunted
·Psijic Order
·Once these are acquired, get the passives from the other armor skill lines except for those requiring you to wear five pieces of that gear type.
Rotation
1. Try to use any abilities that give you a buff first so they make any abilities you use afterwards stronger or help you stay alive longer.
2. You optimally want to use any dots in your build first, so use each dot you have on your enemies, weaving a light attack in between each of them.
3. You should have one spammable ability in your build to use when all your dots are up and you don't need to buff yourself. If you don't want a spammable skill, heavy attacks will be your spammable.
4. Use any CC, shields, and heals as needed. You want to optimally make sure you have a few of these at your disposal when making a build for general playing.
Please bookmark MmoGah's ESO news page for more information related to Elder Scrolls Online items and gold. If you are new to the game, the top 3 class recommendations should help. Don't forget that if you are looking to buy ESO Power Leveling and ESO Champion Points Power Leveling services, then MmoGah is one of the best places to buy MMO gold, accounts, items, and leveling services.


