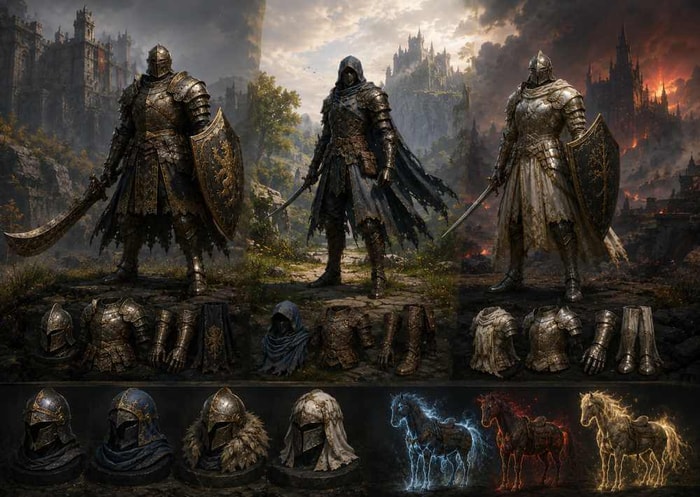
The official Tarnished Pack overview confirms the Heavy Knight and Idus Knight, four new armor sets, and three Torrent skins, while Nintendo also lists new weapon content. The real build question is whether that gear improves your damage per safe opening without damaging stamina, recovery, or Equip Load.
This guide focuses on testing and assembling the new equipment, giving you immediate access to practical damage benchmarks, stamina efficiency checks, and Equip Load breakpoints. You can jump straight into evaluating the new weapons, armor sets, and synergy options introduced in Tarnished Edition without revisiting early-game fundamentals.
⚔️ What the New Equipment Is Best For
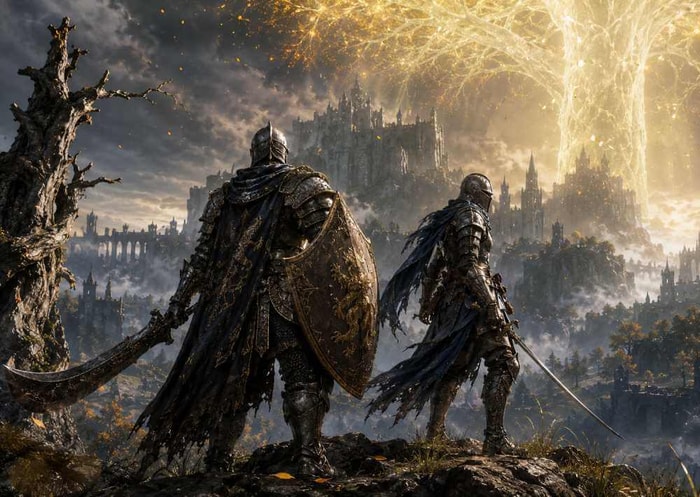
Heavy Knight uses bulky steel armor and a very large scimitar, while Idus Knight favors lightweight gear and dexterous weaponry.
| Gear Direction | Best Use | Test First | Reject It If |
| Heavy Knight weapon | Stance damage and large punish windows | Heavy-attack recovery | You cannot escape the next Attack |
| Idus Knight weapon | Short combos and mobile pressure | Reach, stamina, and skill safety | Its strings repeatedly leave you exposed |
| New heavy armor | Poise and physical protection | Medium Load with your full equipment | It causes Heavy Load for little gain |
| New light armor | Mobility and weight efficiency | Defense gained for its weight | It loses too much defense without reaching Light Load |
Do not decide from Attack Power or appearance alone. A lower-damage weapon can perform better when it lands more reliably and recovers sooner.
🔍 Test a New Weapon in 10 Minutes
1. Meet Only the Requirements
Equip the weapon with the minimum attributes and do not respec yet. Before spending a large amount of EldenRing runes on Strength or Dexterity, test whether the moveset actually suits your build. If two-handing satisfies a Strength requirement, try that before spending additional levels. Avoid adding a second damage stat unless the weapon’s upgraded scaling clearly rewards it.
2. Test Every Useful Attack
Try one- and two-handed light attacks, heavy and charged attacks, running attacks, jumping attacks, rolling attacks, guard counters when relevant, and the weapon skill.
Judge reach, recovery, and remaining stamina before judging damage.
3. Use Three Targets
Fight one normal enemy, one guarded or hard-to-interrupt enemy, and one familiar boss. This tests crowd control, stance pressure, and whether the moveset fits real boss openings.
4. Compare Safe Damage
Bring the new weapon close to your current weapon’s upgrade tier. Compare:
Damage from one safe punish
Stamina left afterward
Time needed to dodge or block
Reach against moving enemies
Practical value of the weapon skill
Keep it when it wins at least three categories. Store it when its only advantage is a larger number on the status screen.
🪓 Build 1: Heavy Scimitar Stance-Break Setup
This build centers on the Heavy Knight’s large scimitar rather than repeating a full Strength leveling route.
Main Weapon: Heavy Knight’s large scimitar
Offhand: Empty for two-handing, or a medium shield while learning
Armor: The strongest mixed set below 70% Equip Load
Attributes: Requirements → Vigor → Strength; add Endurance only when the loadout needs it
Talismans: Axe Talisman, Green Turtle Talisman, Great-Jar’s Arsenal when needed, then Dagger Talisman or Shard of Alexander
Physick: Strength-knot Crystal Tear + Stonebarb Cracked Tear
Combat Plan
Normal enemies: Running Attack → One Follow-Up → Reposition
Fast bosses: Dodge the Final Hit → One Light or Rolling Attack → Reset
Long openings: Charged Heavy → Jumping Heavy → Stance Break → Critical
Two-hand the weapon when a shield is unnecessary. Do not swing twice automatically after every dodge. A fast boss may allow one light attack, while a slow recovery can allow a charged heavy.
Use a shield only when blocking or guard counters improve the fight. Otherwise, it adds weight without helping the main damage loop.
🗡️ Build 2: Idus Mobile Pressure Setup
This build treats the Idus starting weapon as a fast punish tool. It is not automatically a Bleed build, so do not add Arcane unless its final scaling or chosen affinity supports it.
Main Weapon: Idus Knight’s starting light weapon
Offhand: Small or medium shield, or empty for two-handing
Armor: Weight-efficient pieces below 70% Equip Load
Attributes: Requirements → Vigor → Dexterity; add Endurance for stamina and weight
Talismans: Winged Sword Insignia, Green Turtle Talisman, Spear Talisman when thrusts land as counterattacks, and Shard of Alexander only when the skill is central
Physick: Dexterity-knot Crystal Tear + Thorny Cracked Tear
Combat Plan
Normal enemies: Running Attack → Two Light Attacks → Move Away
Bosses: Bait a Combo → Dodge the Final Hit → One or Two Attacks → Reset
Slow targets: Weapon Skill → Short Follow-Up → Exit
End each punish with enough stamina for one emergency dodge. Stop after the second hit when a third would empty the bar.
Light Load is useful only when you can remain below 30% without sacrificing too much defense or spending unnecessary levels. Medium Load is the reliable default.
🛡️ How to Use the Four New Armor Sets
A matching four-piece appearance does not automatically create the strongest setup. Judge each piece separately.
First, equip your weapon, shield, talismans, and other required gear. These determine how much weight remains for armor.
Second, stay below 70% of maximum Equip Load. Entering Heavy Load usually costs more survivability than a small defensive increase provides.
Third, compare weight, physical and elemental negation, poise, and any special effect in the item description. Do not keep a weak helm or gauntlets only to complete a set.
Use these practical combinations:
Heavy Mixed Set: Keep the strongest heavy pieces and lighten other slots to preserve Medium Load.
Mobile Mixed Set: Choose the most weight-efficient pieces and reserve stamina for repeated attacks and dodges.
Boss Resistance Set: Swap one or two pieces for better Magic, Fire, Lightning, or Holy negation.
Armor cannot be upgraded, so switching pieces consumes no Smithing Stones. Its real cost is the Endurance required to carry it. When one piece demands several extra levels, compare that investment with more Vigor or damage.
🔧 Upgrade Without Wasting Materials
After a weapon passes the 10-minute test, make it the only candidate using that Smithing Stone type. Bring it to the tier available in your current area, then stop and retest before spending rarer stones.
When Ashes of War and affinities are available, compare Heavy or Keen with the standard setup. For a unique weapon with fixed scaling, follow its actual upgraded scaling rather than its appearance.
Normal and Somber Smithing Stones use separate paths, so some normal and unique weapons can be developed in parallel. Build a secondary weapon only after the main setup is stable, and respec after confirming the final scaling—not before.
Players completing supporting talismans or equipment can check available Elden Ring items, but a new weapon should still pass the moveset test before becoming the build’s centerpiece.
🧪 Run a Five-Attempt Boss Test
Use a boss you already understand and complete five attempts without changing equipment. Check whether the weapon fits a common opening, leaves stamina for a dodge, gives the skill a real purpose, maintains Medium Load, and reduces unsafe trades.
When the build fails, change only one variable: attack length, armor weight, talisman, skill usage, or weapon. Changing everything at once hides the real problem.
❌ Common Build Mistakes
Avoid comparing an unupgraded new weapon with a finished favorite, wearing a complete set when mixed pieces are stronger, respeccing before testing the moveset, splitting Strength and Dexterity without useful scaling, and assuming new gear must be better.
✅ Which Build Should You Use?
Choose the Heavy Scimitar Stance-Break Setup for decisive punishes, charged attacks, and critical openings.
Choose the Idus Mobile Pressure Setup for shorter attack windows, faster recovery, and constant repositioning.
For either build, test the moveset first, keep Medium Load, upgrade one main weapon, and mix armor by function rather than appearance. That produces a stronger Tarnished Edition build than equipping every new item simply because it belongs to the latest pack.
If you need Tarnished Edition new gear for these setups, check our guide on how to get all new weapons and armor.