Leontiel’s Greatsword is one of the strongest new weapons in Elden Ring Tarnished Edition, but it is not a weapon you should simply spam.
Its real strength comes from three things: a Dexterity-focused damage profile, an excellent thrusting heavy attack, and Muleta, a stance skill that lets you evade an attack and counter immediately.
If you want to use the weapon properly, build around DEX, skill damage, and charged Muleta attacks, then choose your follow-up based on the size of the enemy’s opening.

⚔️ Best Leontiel’s Greatsword Build
Here is the simple setup to copy:
| Slot | Recommended Setup |
| Weapon | Leontiel’s Greatsword +10 |
| Main Stat | Dexterity |
| Talismans | Rellana’s Cameo, Shard of Alexander, Godfrey Icon |
| Playstyle | Muleta dodge → counterattack |
| Equip Load | Medium Load |
Leontiel’s Greatsword requires 13 Strength and 26 Dexterity and is clearly designed around Dexterity. At +10, its scaling reaches B in Dexterity and D in Strength, so there is little reason to build it like a traditional Strength Greatsword.
If you still need Leontiel’s Greatsword or other gear for this setup, you can check our Elden Ring items for available weapons, talismans, armor, and other build essentials.
Recommended Level 150 Stats
Use this as the basic target:
Vigor: 60
Mind: 18–22
Endurance: 25–30
Strength: 13
Dexterity: 75–80
Intelligence: Base
Faith: Base unless using buffs
Arcane: Base
Your priority is:
60 Vigor → enough Endurance for Medium Load → 80 Dexterity → extra Mind if you use Muleta frequently.
Do not keep adding strength after meeting the requirement. The weapon benefits much more from Dexterity investment.
🗡️ Use the Heavy Attack More Than You Think
Do not treat Leontiel’s Greatsword like a normal R1-spam Greatsword.
Its regular heavy attack is a forward thrust rather than the more common sweeping heavy. This gives it:
Better reach
Pierce damage
Faster access to a strong single hit
Stronger punishment against narrow openings
The uncharged heavy comes out quickly enough that, when you only have time for one clean attack, it can be better than using a light attack.
Use this rule:
Tiny opening: R1
Short opening: uncharged R2
Long opening: charged R2 or Muleta heavy
The thrust is especially good against enemies that are already attacking because Pierce damage can benefit from counter-hit situations.
If you haven’t obtained the weapon yet, our Tarnished Edition new weapons and armor guide covers the exact route to Leontiel’s Greatsword and the other new gear.
🔥 How Muleta Actually Works
Muleta is the reason this weapon becomes S-tier.
Enter the stance, then choose:
Light Input
Muleta + Light Attack:
Evades to the left
Performs a fast counter
Costs 10 FP
Deals relatively low stance damage
Recovers quickly
Use it when the boss gives you a short attack window.
Think:
Hold stance → dodge through attack → Light → disengage
This is your safest Muleta option.
Heavy Input
Muleta + Heavy Attack:
Evades to the right
Hits substantially harder
Costs 13 FP
Can be charged
Can lead into another follow-up
This is your main damage option.
Use:
Hold stance → dodge attack → Heavy
When the boss has a medium recovery window.
For large openings:
Hold stance → dodge → charged Heavy → follow-up Heavy
The fully charged version is where the build starts producing very high burst and stance pressure. The charged skill delivers much stronger stance pressure than a normal charged thrust, making it a better choice during long boss openings.
🧿 Best Talismans
Three talismans form the core of the build.
1. Rellana’s Cameo
This is the most important one.
Rellana’s Cameo rewards you for holding a stance before attacking, which fits Muleta extremely well because you can wait in stance for the boss to commit first.
That changes the normal play pattern from:
Find opening → activate skill
to:
Enter stance → wait → boss attacks → evade with Muleta → punish
This is safer and lets you prepare the damage bonus before the opening even begins.
Pls notes that the buff can continue through Muleta’s follow-up sequence, making it particularly effective with the charged heavy route.
2. Shard of Alexander
Muleta is your main damage source, so boosting skill damage is an obvious choice.
Keep this equipped for nearly every PvE version of the build.
3. Godfrey Icon
Use this because Muleta’s heavy input can be charged.
A fully charged Muleta heavy benefits from Godfrey Icon while also stacking with your other skill-focused bonuses.
This is why:
Rellana’s Cameo + Shard of Alexander + Godfrey Icon
is the core damage combination.
Fourth Talisman
Use the final slot for what your character needs:
Dragoncrest Greatshield Talisman – safer boss progression
Two-Headed Turtle Talisman – better stamina recovery
Ritual Sword Talisman – more damage while at full HP
For general PvE, I would use Dragoncrest Greatshield Talisman first.
You already have more than enough damage.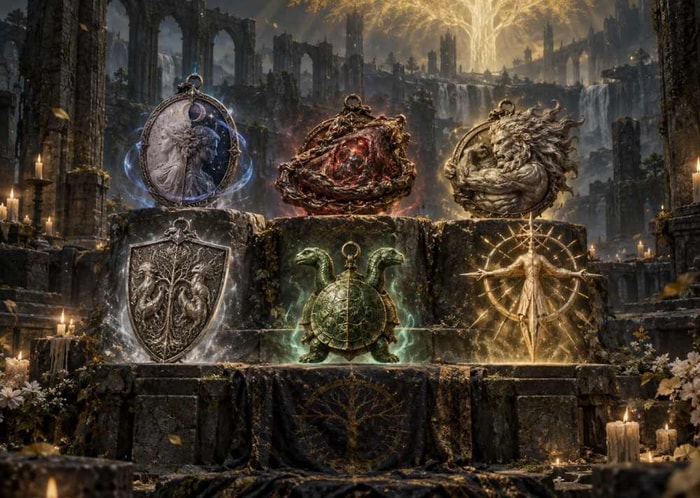
🥋 Armor and Equip Load
Do not force yourself to wear the full Leontiel Set just because the weapon matches it.
The important rule is:
Stay at Medium Load.
Muleta gives you an additional evasive option, but you still need normal rolls for attacks that are poorly suited to its fixed movement.
Use armor to reach comfortable defense and poise without entering Heavy Load.
If the full Leontiel Set keeps you at Medium Load, use it. If not, mix pieces.
🎯 The Correct Muleta Rotation
This weapon becomes much easier when you stop trying to force the same combo into every opening.
Very Short Boss Opening
Use:
Dodge → R1
or:
Muleta → Light
Do not charge anything.
Short Opening
Use:
Dodge → uncharged R2
or:
Muleta → Heavy
Then reset.
Medium Opening
Use:
Hold Muleta → evade → Heavy → follow-up if safe
Do not automatically press the second attack.
Watch the boss first.
Long Opening
Use:
Hold Muleta for Cameo → evade → fully charged Heavy → follow-up Heavy
This is your high-damage punish.
Use it after:
Long recovery attacks
Missed grabs
Knockdowns
Large AoE finishers
Boss stance breaks where a critical is not immediately better.
👹 Boss Strategy by Type
Fast bosses: use Muleta Light or uncharged Heavy; avoid forced charges.
Slow bosses: hold Muleta for Cameo, then charged heavy.
Large bosses: stay near the side or legs and take advantage of the thrusting reach.
Multi-hit bosses: roll through the combo first, then use Muleta on the final hit.
Staggerable bosses: prioritize charged R2 and charged Muleta Heavy.
👹 How to Fight Fast Bosses
Fast bosses are where most players misuse this weapon.
Do not stand in Muleta waiting for every attack.
The stance has strong evasive properties once the movement begins, but it is not an instant replacement for your normal roll. You still need time to enter and hold the stance first.
Against aggressive bosses:
Roll normal multi-hit strings.
Identify the final attack.
Enter Muleta before the final predictable hit.
Evade through it.
Use Light or uncharged Heavy.
Reset immediately.
Do not chase the charged attack unless the boss clearly gives you enough time.
💥 How to Stance-Break Enemies
If your goal is stance damage, do not spam Muleta Light.
The light version is mainly for safe counter damage, not maximum stance pressure.
Instead prioritize:
Charged R2
and:
Charged Muleta Heavy
The latter delivers significantly stronger stance pressure than the basic Muleta inputs, making it the better choice when you have a longer opening.
Against slow enemies, rotate:
Charged R2 → reposition → charged Muleta Heavy → reset
Do not keep attacking simply because the enemy has not staggered yet.
❌ Common Mistakes
Spamming Muleta
Muleta is reactive.
Use it to answer an attack, not as a button you repeatedly press in neutral.
Charging Every Heavy
Godfrey Icon and Rellana’s Cameo make charged attacks attractive, but forcing both buffs into every opening will get you hit.
A safe uncharged Heavy is better than a charged Heavy that trades damage.
Building Strength
Meet the 13 STR requirement and stop.
This is a Dexterity weapon.
Ignoring FP
Muleta Light costs FP, Muleta Heavy costs more, and repeated use drains your bar quickly during long fights.
Carry enough Cerulean Flasks or raise Mind slightly if you rely heavily on the skill.
Using the Follow-Up Automatically
Muleta’s second heavy is powerful, but the boss may already be starting another attack.
Treat it as an option, not part of a mandatory combo.
✅ Is Leontiel’s Greatsword Really S-Tier?
Yes, especially for PvE players who are comfortable timing Muleta around enemy attacks.
Its biggest strength is not raw damage alone, but how well its thrusting attacks and Muleta counters turn boss openings into high-damage punishes. The trade-off is that the weapon rewards timing and positioning rather than mindless skill spam.
If you can consistently read boss recovery windows, Leontiel’s Greatsword is easily one of the strongest Tarnished Edition weapons to build around.
Reference:
Leontiel’s Greatsword Is S Tier! New Weapon Breakdown | Elden Ring Tarnished Edition