This Variant Dungeon contains 13 possible routes, each determined by the choices you make during the run. Different interactions, environmental mechanics, and decisions will lead to different endings and notes recorded in your duty journal.
Meoni shared a video on his YouTube channel, focusing specifically on the actions that change the final route outcome. If you're trying to unlock every entry, follow the instructions for each route carefully. If you want a faster way, you can choose MmoGah to buy the FF14 dungeon boost directly, which is simple and safe. Now, let's dive into the article.
Key Takeaways
- This Variant Dungeon has 13 routes. Routes 1–4 start on the left Residential Paths, Routes 5–8 on the right Market Paths and Routes 9–12 down the middle Gate Paths.
- Ignoring an interaction is a route of its own: Routes 4, 8, 10 and 12 come from leaving the damaged fence, the conch shell, the magnetic rocks and the floating rocks alone.
- Several choices also change the final boss mechanics, such as saving the baby chicks on Route 1 or letting the Goobbue absorb all four gem piles on Route 5.
- Route 13 unlocks a secret boss: stand at the altarMarket Path (right side), then Seaweed after the first bossPast the Goobbue monsterMentioned by the NPCStand at it to activate the puzzle, use /bow and type /say I am returned! to activate the musical platforms, then play them in the order Coral – Conch Shell – Starfish – Pearl.
- Finishing all routes and exiting the dungeon unlocks a follow-up quest and the title "Professional Protagonist". The reward is not a mount but Facewear items (face masks) in different colors.
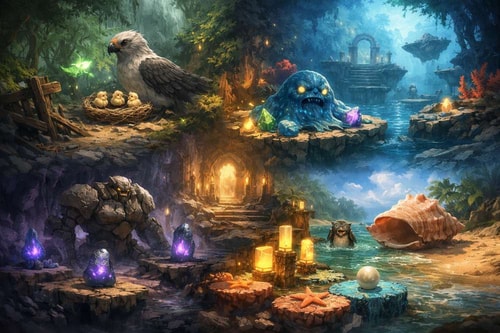
All 13 Routes at a Glance
| Route | Starting path | Crossroads choice | What to do |
|---|---|---|---|
| 1 | Residential (left) | "Let's follow the fruit" | Knock over the damaged fence, follow the muddy embankment and kill the Wind Sprite at the nest |
| 2 | Residential (left) | "Let's follow the fruit" | Break the damaged fence and go down the muddy embankment, but let the Wind Sprite steal the fruit and leave |
| 3 | Residential (left) | "I have a good feeling about the other way" | Kite the two Alry Wisps so their Ancient Aero hits the cracked barricade, then take the hidden path on the far left |
| 4 | Residential (left) | "Let's follow the fruit" | Don't interact with the damaged fence; kill the Wind Sprites normally in the open area |
| 5 | Market (right) | Seaweed | Let the Goobbue absorb all four gem piles, then defeat it |
| 6 | Market (right) | Seaweed | Pull the Goobbue onto the bridge so it doesn't absorb the gemstones, then read the message in a bottle |
| 7 | Market (right) | "Walk along the beach" | Blow the giant conch shell |
| 8 | Market (right) | "Walk along the beach" | Don't interact with the giant conch shell |
| 9 | Gate (middle) | Mushrooms | Place the blue AoE next to each of the three magnetic rocks so they glow purple |
| 10 | Gate (middle) | Mushrooms | Kill the golem quickly and make sure none of the rocks glow |
| 11 | Gate (middle) | Floating Rocks | Stand near each of the three rocks until it pulses and changes color |
| 12 | Gate (middle) | Floating Rocks | Don't stand near any of the rocks |
| 13 | Market (right) | Seaweed | Continue past the Goobbue, stand at the altar, use /bow, type /say I am returned! and play Coral – Conch Shell – Starfish – Pearl |
Residential Paths (Left Side)
Route 1 – Save the Baby Birds
At the start of the instance, head left toward the Residential Paths. When you reach the fruit tree crossroads, choose "Let's follow the fruit." After defeating the first boss and clearing a trash pack, you will reach a large clearing with an NPC nearby. On the right side, there is a damaged fence.
- Interact with the damaged fence to knock it over.
- Follow the muddy embankment path that appears.
- You will encounter a nest with baby birds and a Wind SpriteTries to steal fruit from the baby birds' nestKill it to save the chicks: Route 1Let it steal the fruit and leave: Route 2 attempting to steal fruit.
- Kill the Wind Sprite.
Doing this saves the baby chicks, and their mother returns to protect them. This decision also alters the final boss mechanics. Defeat the final boss to complete Route 1.
Route 2 – Let the Sprite Take the Fruit
Follow the same path as Route 1:
- Go left through the Residential Paths.
- Choose "Let's follow the fruit."
- Break the damaged fence.
- Go down the muddy embankment.
- When you reach the nest event, do not kill the Wind Sprite. Instead, allow it to steal the fruit and leave.
This choice changes the final boss mechanics. Defeat the final boss to unlock Route 2.
Route 3 – Destroy the Barricade with Wind Sprites
Start again on the left Residential Path. At the fruit tree crossroads, choose "I have a good feeling about the other way." This route leads through a cave area where you will fight a Genie boss.
Later in the path, you will encounter two Wind Sprites called Alry Wisps. They have an ability called Ancient AeroAbility of the two Alry WispsKite them so it hits the cracked barricade near the entrance doorDestroys the wall and opens a hidden path on the far left. Near the entrance door is a barricade with visible cracks. Kite the Alry Wisps so their Ancient Aero attack hits the cracked barricade. This destroys the wall and opens a hidden path on the far left. Continue through this path and defeat the final boss to complete Route 3.
Route 4 – Ignore the Fence
Again, take the left Residential Path. At the fruit tree crossroads, choose "Let's follow the fruit." After the first boss:
- Walk through the clearing.
- Do not interact with the damaged fence.
- Continue forward until you encounter the Wind Sprites.
- Kill them normally in the open area.
Proceed normally and defeat the final boss to unlock Route 4.
Market Paths (Right Side)
Route 5 – Feed the Goobbue Monster
From the start of the dungeon, go right toward the Market District. After defeating the Genie boss, you will reach a crossroads with two options: Gather Seaweed and walk along the beach.
Choosing Seaweed takes you to the Coral Route. You will find a Goobbue monsterSeaweed path, surrounded by four gemstone pilesHas a suction abilityLet it absorb all four gem piles: Route 5Pull it onto the bridge instead: Route 6 standing on a platform surrounded by four gemstone piles. The monster has a suction ability. Position yourself so the Goobbue absorbs all four gem piles. Once all gems are consumed, defeat the monster. This adds additional mechanics to the final boss. Defeat the final boss to complete Route 5.
Route 6 – Read the Message in a Bottle
Follow the same start as Route 5: right side Market Path and choose Seaweed. When you reach the Goobbue monster, pull it onto the bridge so it does not absorb the gemstones. After defeating it, you will find a message in a bottle. Read the message and continue to the final boss. Defeating the boss unlocks Route 6.
Route 7 – Blow the Conch Shell
Go through the Market Path again. At the crossroads after the first boss, choose "Walk along the beach". As you progress, you will find a giant conch shellOn the “Walk along the beach” pathBlow it: summons a creature from the waterAlso modifies the boss mechanics (Route 7)Leave it alone: Route 8. Blow the conch shell. This noise summons a creature from the water and modifies the boss mechanics. Defeat the final boss to complete Route 7.
Route 8 – Ignore the Conch Shell
Same start as Route 7: Market Path, then choose "Walk along the beach". When you reach the giant conch shell, do not interact with it. Proceed to the final boss and defeat it to unlock Route 8.
Gate Paths (Middle Route)
Route 9 – Activate the Magnetic Rocks
Head straight down the middle path. Eventually, you must choose between Floating RocksThree large rock platformsStand near each until it pulses and changes colorAll three activated: Route 11None activated: Route 12 and Mushrooms.
Choose Mushrooms. Inside the cave is a large golem and three magnetic rocksThree in the Mushrooms cave, with a large golemPlace the blue AoE next to one: it glows purpleAll three activated: a wall opens (Route 9)None glowing: Route 10. During the fight, a player will receive a blue AoE marker. Place the AoE next to a magnetic rock. The strike magnetizes the rock and makes it glow purple. Repeat this for all three rocks. Once all three rocks are activated, a wall opens.
Tip: After defeating the golem, you can also find a book on the floor, which provides lore clues for the secret route.
Defeat the final boss to complete Route 9.
Route 10 – Do Not Activate the Rocks
Follow the same Mushroom path as Route 9. However, kill the golem quickly this time.
Warning: Do not allow any AoE to hit the magnetic rocks. Make sure none of the rocks glow.
Defeat the final boss to unlock Route 10.
Route 11 – Activate Floating Platforms
Go down the middle path again. This time, choose Floating Rocks. In this area, there are three large rock platforms. Stand near each rock until it pulses and changes color. This indicates the rock has been activated. Activate all three rocks, clear the enemies, and defeat the final boss to unlock Route 11.
Route 12 – Ignore the Floating Rocks
Follow the same Floating Rocks path as Route 11. But this time, do not stand near any rocks and avoid activating them. Defeat the final boss to complete Route 12.
Route 13 – Secret Boss Route
The final route unlocks a secret boss, quest, title, and achievements.
- Start by choosing the Market Path (right side) again.
- After the first boss, choose Seaweed, and continue past the Goobbue monster.
- You will find an altar mentioned by the NPC. To activate the puzzle, you need to stand at the altar.
- Use the emote /bow, and then type /say I am returned! This activates several musical platforms with symbols.
- Play them in this order: Coral – Conch Shell – Starfish – Pearl.
When played correctly, the platforms light up, and a bridge appears, leading to the secret 13th boss. Defeat the boss to complete the final route.
Rewards for Completing All Routes
After finishing all routes and exiting the dungeon, you will unlock a follow-up quest and gain the title "Professional Protagonist". Unlike previous Variant Dungeons, the reward is not a mount. Instead, players receive Facewear items (face masks) in different colors.
These masks occupy the facewear slot, meaning they can be worn alongside helmets for additional cosmetic combinations. While some players appreciate the customization, others feel it is less exciting compared to the mount rewards from earlier Variant Dungeons.
Want a faster way to unlock every route? You can choose MmoGah to buy the FF14 dungeon boost directly.
Buy FFXIV BoostingFAQ
How many routes does this Variant Dungeon have?
It contains 13 possible routes, each determined by the choices you make during the run. Routes 1–4 start on the left Residential Paths, Routes 5–8 on the right Market Paths and Routes 9–12 on the middle Gate Paths, while the secret Route 13 starts on the Market Path again.
How do you unlock the secret boss route (Route 13)?
Take the Market Path (right side), choose Seaweed after the first boss and continue past the Goobbue monster to the altar mentioned by the NPC. Stand at the altar, use the emote /bow, then type /say I am returned! and play the musical platforms in this order: Coral – Conch Shell – Starfish – Pearl. When played correctly, a bridge appears, leading to the secret 13th boss.
How do you destroy the barricade for Route 3?
On the left Residential Path, choose "I have a good feeling about the other way" at the fruit tree crossroads. Later, kite the two Alry Wisps so their Ancient Aero attack hits the cracked barricade near the entrance door. This destroys the wall and opens a hidden path on the far left.
How do you activate the magnetic rocks for Route 9?
Go down the middle path and choose Mushrooms. During the golem fight, a player receives a blue AoE marker: place it next to a magnetic rock to make it glow purple, and repeat this for all three rocks so a wall opens. For Route 10, kill the golem quickly and make sure none of the rocks glow.
Do your choices change the final boss?
Yes, several do. Saving the baby chicks (Route 1) or letting the Wind Sprite take the fruit (Route 2) changes the final boss mechanics, feeding all four gem piles to the Goobbue adds mechanics to the final boss (Route 5), and blowing the conch shell summons a creature from the water and modifies the boss mechanics (Route 7).
What are the rewards for completing all routes?
After finishing all routes and exiting the dungeon, you unlock a follow-up quest and gain the title "Professional Protagonist". Unlike previous Variant Dungeons, the reward is not a mount: players receive Facewear items (face masks) in different colors, which occupy the facewear slot and can be worn alongside helmets.