Hey exiles, welcome to Navandis Gaming's Path of Exile guide, this time MmoGah will be telling you everything you need to know about the Heist mechanic. I'll be covering the very basics, such as how to run your first heist, crew members, and how to get your full team, their skills, perks, and gear, all the way up to grand heists. I'll also talk about what rewards you can expect from each type of heist, as well as a few tips and tricks on how to maximize your heist profit.
Before diving into the guide properly, I need to add two short disclaimers. First, while the core mechanic is unlikely to change, some aspects might be tweaked and balanced as the league progresses. For example, a few weeks from now, lockpicking heists may no longer be the most profitable ones. Since I can't really predict the future, I'll leave it to you to keep an eye on patch notes and up to date with any changes.
Okay, with that out of the way, let's talk about Rogue's Marker, Contracts, and Blueprints. These are found either as drops from literally any mobs outside heists or in "smuggler's caches" which can spawn in each act of the campaign or Atlas maps.
Rogue's Marker has two basic uses; first, while in your hideout or any town, you can right-click on them to open a portal to the rogue harbour. Once in the rogue harbour, most services provided by various NPCs there, including your crew members, will cost some amount of rogue's marker. As they say, no honor or freebies among thieves.
Contracts are the PoE Items used to open up a heist, and if you're familiar with Atlas maps, they're the equivalent for the Heist system. They can be crafted using PoE Currency such as orbs of transmutation, augmentation, alteration, alchemy, etc. That will generally increase the amount and rarity of the loot you'll get and make the resulting heist more dangerous.
Finally, blueprints are the Path of Exile Items used to start a grand heist, which is a collection of several regular heists. I'll come back to grand heists a bit later with a few extra twists. Still, I'll add that markers, contracts, and blueprints can all be traded with other players.
So, you have a few markers in your pocket, a nice contract, and you've just teleported in the rogue harbour looking to run your first heist. Completing each contract will always require a single rogue skill, such as lockpicking or demolition, at a certain minimum level, and this is visible in the contract's description. As such, when running a contract, you'll need to hire a crew member who has that specific skill. You can check which crew members you have available in your roster by pressing the V key while in the rogue harbour. At first, you'll only have 3 members available for hire, but you'll eventually enlarge your team to 9. Initially, you'll do this by finding these green contracts in smuggler's caches. These are quest items that can be used in the rogue harbour to open a special type of heist. In addition to that, running heists with a recently unlocked crew member will have them introduce you to a new rogue character that will join your team after completing that heist.
Every crew member can have between 2 and 4 different skills. Each capped between levels 2 and 5. The list of skills for each rogue, and the maximum level for each skill, are pre-determined and cannot learn new skills or change existing ones. So let's take Tulina here as an example. She has agility, lockpicking, and trap disarmament skills. That's all she has and all she'll ever have. For Tulina, lockpicking is capped at level 3, trap disarmament at level 2, and agility at level 5. I can further level up her agility skill by completing contracts that require this ability. On the other hand, Nenet has perception and counter-thaumaturgy skills, capping at levels 5 and 4, respectively. Each crew member also has one unique set of heist perks, and the bonuses these provide increase when leveling up any of the rogue's skills.
Alright, so now you have a contract requiring skill that one of your rogues is proficient in. The next step is to talk to Adiyah, the most important NPC in the entire town. Once you hand her a contract, she'll ask you to choose one of the available crew members to take with you in that heist. You'll also see the total upfront markers cost, broken down between travel fee for the portal, hiring fee for your rogue, and the ring's cut. Each of these taxes can be decreased or even nullified through your follower's items or with various mods on the contract itself. After you step through the portal, you'll be taken to a safe zone where you can turn on your auras or summon minions before going into the heist itself.
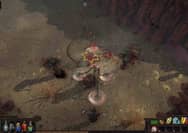
Once inside, you should open up the map and check the available rewards and the general route to the final objective room, depicted by this showcase icon. As you progress through the heist, you'll encounter various locked doors and traps, and you can either click on the icon or press V to have your rogue take care of these obstacles. These actions do not raise your alert level, and neither does killing any guards you come across. However, opening small or large chests will do so, and the exact amount is shown while hovering over them. This is affected by your rogues' perks and items, such as Karst or Tulina can open all the chests in an entire heist without triggering the alert. Any items you pick up are marked as contraband and have a padlock icon, meaning you cannot use or identify them until you escape. You cannot open portals, and you're limited to one full inventory, so choose wisely. If you die during the heist, all the contraband items will drop, and there is absolutely no way to come back or recover them.
Once you reach the final room with the curio display, you need to break it and grab the quest item inside. Regardless of what your alert level was before that, this action will fill it up entirely and trigger a complete lockdown after a short time. During this lockdown countdown, you can still open chests, and some rogues have special perks that further increase this timeframe. You can take advantage of this by leaving several unopened chests close to the final room, so you don't yet trigger the alarm. Open all the doors and kill all the guards, quickly open all the leftover chests, starting from the one furthest away than break the curio display. You can also leave the loot on the ground as you can still pick it up after the complete lockdown. If you time this correctly, you can open a few extra chests each heist, which adds up in the long run. Once the alarm breaks out, new guards will start spawning in large numbers. These are much stronger than the hobos you encountered on the way in and can quickly kill you if you're not prepared. Your absolute number one priority is to keep advancing towards the exit, which is the same place you came in through. Guards will keep spawning regardless of how many you kill, and you'll end up swamped if you don't push your way to the exit. On top of that, certain doors you've opened on your way in will now be locked once again, with a large number of tough enemies waiting for you behind them. This will put additional pressure on you as you'll need to deal with packs of mobs coming in from behind as well as those swarming in once you open the doors. While the first waves of mobs will provide XP and drops, subsequent ones don't prevent infinite farming abuse. As such, there's no reason to hang around, and it's incredibly risky to do so anyway. Once you finally get out, your rogue will gain a certain amount of XP for the skill they used in that heist, and you get to keep all the loot, which is no longer marked as contraband. The quest item you've picked up from the final room can be sold to this "Fence" NPC for a decent amount of markers, offsetting the cost of running the heist. You can also leave a heist before triggering the alarm, and you'll get to keep the loot you've gathered up to that point. While this doesn't provide any XP for your rogue or markers from selling the target item, it might be worth it if you've picked up something very valuable and don't want to risk losing it by dying once the alarm is triggered.
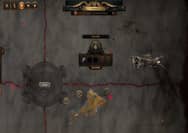
After running a few heists, there's a high chance you've started finding bits and pieces of rogue gear. Each crew member can equip 4 different items: a brooch, weapon, tool, and cloak. Tools are skill-specific and can only be equipped by rogues with those skills, while the rest of the gear pieces are generic. All these can and should be crafted using currency such as orbs of transmutation, alteration, regal, etc. Brooches can roll mods that provide a chance to duplicate certain rewards from heist chests. For example, this one has a chance to duplicate divination card rewards as well as sextants.
On top of that, it increases the heist target item, netting you more markers when sold to the fence. Weapons can increase both the rogue's damage as well as yours. They can provide auras that will affect you and reduce fees for running a contract or increase the XP your rogue is getting. Cloaks are used to lower the overall alert level, increase the lockdown timer, and provide a chance to raise the alert level when opening a chest. Finally, tools are generally about reducing fees, increasing XP as well as making your rogues quicker at their jobs. This becomes quite important, especially when you're trying to get out quickly with a whole bunch of loot. The last thing you need then is to wait 5 extra seconds for Tibbs to blow up a door.
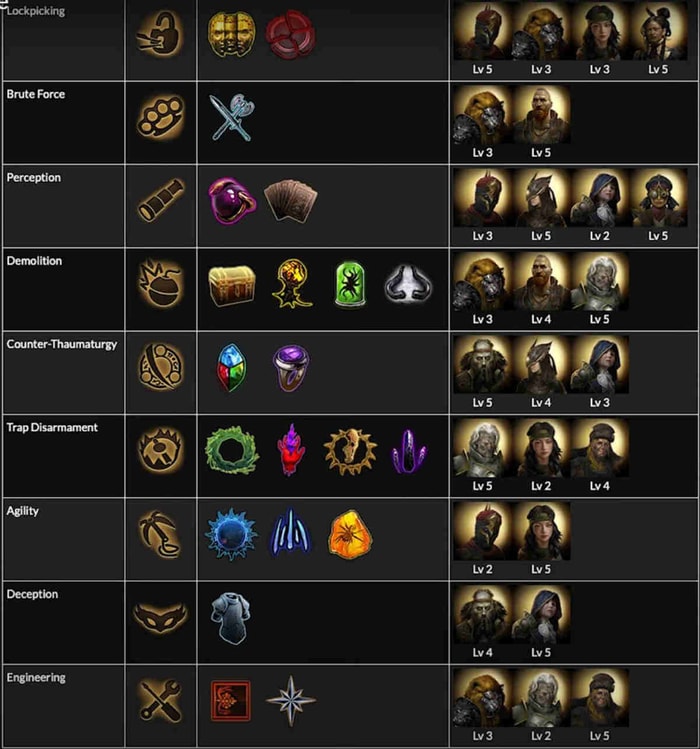
After running a few heists, you might notice some patterns regarding the types of rewards you get from the big chests. And indeed, there is a direct correlation between the heist types, aka what rogue skill it requires, and the type of reward chests you'll find inside. Here's a handy table that shows the association between heist types and rewards and which crew members have the respective skill, and the level it caps at. This is not set in stone and can change as the league progresses for balancing purposes.
Finally, let's talk about grand heists. As mentioned earlier, these are a collection of individual heists called wings, and they're accessed using blueprints. Each blueprint will indicate how many wings, escape routes, hidden treasure rooms it has, and the type of rewards found in the final room.
By default, blueprints you find only have one wing revealed, but you can unveil additional ones by talking to the NPC Whakano. This will cost a certain amount of markers, as well as a reveal token. You obtain one such reveal token for each regular heist you complete, and certain rogue item mods have a chance to grant you an additional one each run. Apart from entire wings, you can also reveal individual reward rooms and escape routes inside them. These can make the overall grand heist much more profitable and increase your chance to escape with all the contraband loot. Of course, it is not mandatory to unveil all the reward rooms or even all the wings. It's also worth noting that Gianna and Niles' crew members will provide reveals at a lower price. The value of the discount is based on their rogue perk.
Once you're happy with your blueprint, it's time to decide on the rogues' team that will accompany you, which is done in the Planning Room. This time you won't bring just a single crew member as grand heists require several different skills for each wing. Still, each rogue has multiple skills, and certain grand heist wings might require 2 or more jobs performed by the same crew member. In this case, you can select them multiple times. If you have the same rogue present twice in the same heist wing team, their perk and gear bonuses will apply twice, multiplicatively. This may or may not be desirable on a case by case basis, and it's up to you to decide in each scenario. After you've decided on your team, confirm the plans, grab your blueprint, and go to Adiyah.
Once you step through the portal, you'll be teleported to a common staging area that connects all the grand heist wings. The task is simple: complete each wing and make it out alive with all the loot.
The key difference from regular heists is the final room: instead of a quest item sold for markers, you get tangible rewards. These can be alternate quality gems, replica uniques, enchanted items, or Path of Exile Currency and trinkets. The blueprint for each grand heist will indicate exactly what type of rewards you'll be getting in the final room. Once you reach there, you'll notice several display cases, but you can pick up just a single item. As soon as you break one display case, the wing will go into lockdown, and you won't be able to loot the other items in the room.
Once you complete an individual wing and make it out with the loot, you should theoretically be able to teleport to the rogue harbour, empty your inventory and go back in to complete the remaining wings. However, at the time of recording this guide, you won't be able to return to your grand heist due to a bug, as your portal is in another rogue harbour instance. My advice is to avoid doing that until the bug is confirmed to be fixed.
Finally, earlier I've mentioned trinkets as a possible reward. These are a new type of item for your character, and you unlock the trinket gear slot in your first blueprint with the reward type "Thieves' trinkets or currency" Trinkets will always drop corrupted, so they cannot be modified or re-crafted. They will only roll mods affecting Heist rewards. For example, they can provide a chance for dropped currency to be upgraded into a higher tier one. This trinket here gives a 5% chance for augmentation orbs dropped in heists to be transformed into Chaos Orbs. Other mods will increase the overall quantity or rarity of dropped items, improve big chests, and other similar rewards.
That's all about this PoE Guide, and thanks, Navandis, for this video! You can come to mmogah.com to view lots of useful PoE Builds, and you can also Buy PoE Currency like Exalted Orb here.