Sometimes, when you complete a Stage in the Infinite Archive, a Portal to the Unknown will appear. This portal leads to a mini-game where you must complete a task while avoiding hazards. In this guide, CozyCaster will explain the puzzles found throughout the Infinite Archive of The Elder Scrolls Online.
Pro tips: To ensure success in the Infinite Archive dungeon, it is crucial to prepare adequately, including acquiring enough coins to cover the costs associated with the challenge in ESO.

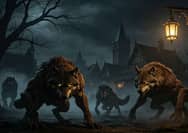
A Portal to the Unknown in the Infinite Archive of ESO
What Are Portals to the Unknown
In the Infinite Archive, after completing a trash mob Stage, you may come across a smaller Portal to the Unkown located beside the main one. This portal leads to a mini-game where you must complete a task while avoiding hazards. You only get one chance to succeed, but if you do, you'll receive an additional reward chest and a second Verse buff for the next Stage.

The five puzzles in Infinite Archive of ESO
Currently, there are five different puzzles and five different variants for each, progressively getting more challenging each time you defeat a previous version.
After completing all five variants of a puzzle, you will unlock an Achievement and a permanent Upgrade. These can be purchased from Filer Tezurs.
The Five Puzzles in Infinite Archive
1. Treacherous Crossing
The objective of the first mini-game, Treacherous Crossing, is to hit all the switches to clear the ink puddles from the hallway and then reach the final switch.
Stepping into a puddle won't kill you, but it will send you back to the beginning of the room. This puzzle can be completed more easily with two players: one can walk across while the other hits the switches. However, with two players, you'll have less time to get across the room than you would as a solo player. You can determine the correct order for hitting the switches to make it easier to cross. As a solo player, you have enough time to hit all the switches as quickly as possible and run across the room efficiently.
Completing the Mind Over Magick Achievement for this puzzle unlocks a permanent movement speed Upgrade for purchase – Tentacular Motivation.
2. Haefal's Butchery
In order to finish Haefal's Butchery, you must gather three sweetrolls that are scattered throughout the map while being pursued and attacked by a butcher. If you are in a duo, there will be two butchers, but this does not apply to Companions.
Every sweetroll increases your Ultimate. Once charged, you can use it to defeat the butcher immediately. The screen will tell you to turn and fight, and this is when you drop your Ultimate on the butcher.
The first three difficulties of this mini-game are identical. However, during the fourth and fifth Stages, your maximum Stamina is reduced by 100 each time. It is important to use the environment to create distance between you and the butcher. You can jump off ledges or go the long way around to increase the gap between you and the butcher.
Completing this puzzle will unlock the Kidding Around Achievement and grant you access to the Sweeter Deal ability, which allows you to select from three Verses permanently.
3. Filer's Wing
Upon entering the Filer's Wing mini-game, Filer Kor will turn you into a watching, and you will have to navigate a maze of bookends and Abyssal Tendrils to find and kill Tomeshells.
After the transformation, your skill bar will change into:
1. Tentacle Torment: AoE Attack
2. All Seeing: Makes the Tomeshells visible through walls for a limited time.
3. Speedy Tentacles: Speed Boost
4. Paralyzing Blast: Frontal AoE Stun
5. Ink Spray: Drops black goo behind you
To help you in your game, you can use your second skill to see the Tomeshells even when they are behind walls. When you spot one, use your first ability to attack it. Remember that you have a limited amount of health and cannot heal if you are injured. At first, you will only need to find one Tomeshell, but in the final Stage, you will need to find four. So, make good use of your skills to succeed.
Not only will you need to avoid the traps, but there are also some enemies running around in the later rounds that can cause significant damage to you, and if you lose all your health, you will fail the challenge. Proceed with caution and take your time, as there is no time limit in this challenge.
If you plan on playing this mini-game with a friend, it's recommended that you travel the room together. By doing so, you can support each other with synergies and revive each other when necessary. Solo players might find it difficult to win this game, but duo groups will need to acquire twice the number of Tomeshells to emerge victorious.
When you complete the Filers Wing, you'll earn the Eye See You! Achievement. This Achievement will allow you to buy the Filer Kor's Truesight Upgrade from Filer Tezurs' shop. However, note that if you finish all games and quests except one, then only that one will appear in the Unknown portal until you complete level 5.
4. Echoing Den
During the Echoing Den mini-game, your objective is to collect all the glowing souls and take them to the center of the room before the time runs out. If you move too fast, the lights will stop following you, but if you move too slowly, you might run out of time. Stage 1 requires you to return only one ghostlight, but in the later Stages, you need to return six of them.
This task is less difficult to perform using a controller. With a joystick, you can move around the room carefully to collect all the ghostlights and bring them to the center. However, if you're using a PC, it is suggested to move backward or block-walk to maintain a slow speed.
This mini-game remains the same whether you play alone or with a partner. Completing it earns you the Ghostlight Gather Achievement, which enables you to purchase the permanent Upgrade known as Ghostly Gratitude. This Upgrade strengthens the power of your chosen Verses, giving you an advantage.
5. Theatre of War
In the Theatre of War, you will need to face an Arcanist in combat. Initially, the fight will be simple, but as you progress, the Arcanist will introduce more mechanics, making it more challenging. It becomes very similar to the Arcanist world boss in Necrom. It is crucial to interrupt her attacks when necessary and avoid the tentacles and AoEs that will spawn at your feet.
In the later phases, you will notice one or two crystals inside the room. These crystals will start glowing and shoot projectiles at you with increasing damage. Keep an eye out for a small green light that emerges from the enemy's hand, which will awaken the crystals. When this happens, focus on the crystal to destroy it. If you are playing with two players, be prepared to face twice the number of tentacle spawns.
This mini-game unlocks the Hidden Prowess Achievement, which grants you a permanent Upgrade called Aramril's Training. This Upgrade strengthens your Visions.
What If You Lose
You won't lose a life if you fail any mini-games, but you will be moved to the next Stage. It's worth giving it a shot.
What Puzzles Will You See in a Group
When you complete the final level in all of the puzzles, you will only come across level 5 puzzles when playing solo. However, when you are in a group, the puzzle's level is determined by the player with the lowest level completed.
Archive Quests
In addition to the five different puzzles, there are two quests that you can pick up randomly in the portals. Completing them will reward you with a permanent, one-time Upgrade that increases your thread count. The Upgrade, called Destozuno's Safety Net, can be found at Filer Tezurs and costs 30,000 Archival Fortunes. Although it may seem like a high price, it's definitely worth it as it gives you an extra life in every run.
A Bookbinder's Bind
In the "A Bookbinder's Bind" quest, you must collect five sheaves of paper. Once you have collected all the pages, you will be asked to return to Destozuno. At the end of that Stage, a Portal to the Unknown will open and take you back to Destozuno.
Restoring the Resurrected
Once you have assisted Destozuno in locating the pages of the book, she will require additional aid from you. She will send you to search for and unlock seven lockboxes in the quest named "Restoring the Resurrected". Similar to the previous quest, these lockboxes will appear randomly during a trash mob Stage, and your success in finding them quickly will depend on RNG.
When you grab the last one, a Portal to the Unknown will open up. You can then talk to Destozuno to unlock the Word Waltzer Achievement. After doing so, you'll be free to buy your safety net. However, if you're in the middle of an active run, the extra thread won't appear until your next run after making the purchase. Additionally, if both you and your duo partner have the Upgrade when the run starts, the team will get two extra threads, which equals out to five in total.
All of the other Upgrades can take effect during an active run, and every Archive Upgrade is an account-wide unlock added to your collection. So, you only need to purchase them once.
Restorer of Theories Daily
Destozuno's Library also has a daily quest named "Restorer of Theories". Completing the quest for the first time each day will yield 500 Archival Fortunes, while any additional characters will only receive 100.
If you found this guide helpful, please give the video a thumbs up and subscribe to CozyCaster's channel for more future content.
YOU MAY ALSO LIKE:
How to Progress Further in the Endless Archive of ESO
ESO Endless Archive: Magicka Dragonknight Solo Build
ESO Builds: Endless Archive Templar Solo Build