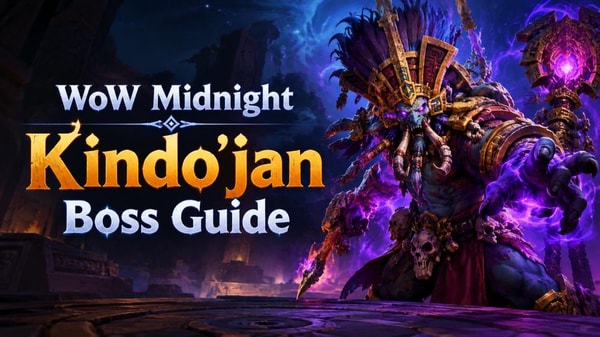
Kindo’jan is the final boss of the Labyrinth of Kindo’jan, a new type of delve content introduced in World of Warcraft: Midnight. Similar to seasonal Delve Nemesis bosses, Kindo’jan features punishing mechanics that can quickly end an attempt if players repeatedly fail to avoid incoming attacks. This guide, shared by MrRoguery on his YouTube channel, covers the Labyrinth of Kindo’jan location, how to unlock the boss encounter, Kindo’jan’s abilities, strategies for each phase, the recommended Valeera setup, the best Corrosive Powers, and the rewards available for defeating him.
1. Labyrinth of Kindo’jan Location
The Labyrinth of Kindo’jan is located in the southeastern part of Eversong Woods, near the border with Zul’Aman. You may need to complete several quests to gain access to the Labyrinth. These quests begin just outside its entrance, so check the surrounding area if you cannot enter immediately.
2. How to Unlock the Kindo’jan Boss Fight
To access the final boss, you must complete all nine other chambers of the Labyrinth of Kindo’jan on Tier 8 or higher. Follow these steps to unlock the encounter:
1. Enter the Labyrinth of Kindo’jan and complete the required quests if necessary.
2. Clear all nine other chambers on Tier 8 or above.
3. Wait for the notification indicating that the door in the northernmost chamber is accessible.
4. Enter the northern chamber and defeat Den’zara.
5. Once Den’zara is defeated, Kindo’jan will spawn.
Before starting the encounter, make sure you understand the boss’s avoidable mechanics. Kindo’jan has a strict failure condition that makes unnecessary hits particularly dangerous.
Get Ready for Midnight Endgame Content
Unlocking Kindo’jan is only the first step. Preparing your character for challenging Delve encounters may also involve upgrading gear and stocking up on useful consumables. With MmoGah World of Warcraft Gold, players can explore another option for obtaining gold and spending less time on currency farming.
3. Kindo’jan Boss Abilities and Mechanics
The Kindo’jan encounter has three main sections: Phase 1, an intermission, and Phase 2. The final phase combines the mechanics from the first phase with the intermission mechanics, making positioning and movement increasingly important.
Phase 1: Main Boss Mechanics
Kindo’jan remains stationary in the northern part of the arena during the first phase. He cannot be moved, and his melee attacks deal relatively low damage. However, the damage can accumulate if you lack passive health regeneration. Your primary goals are to avoid dangerous attacks, manage the summoned enemies, and prevent permanent ground effects from covering the arena.
Eruption of Mojo
Kindo’jan places a circle around your character. After approximately three seconds, the effect deals a small amount of damage and leaves behind a permanent void zone. He also creates one large circle and several smaller circles that you must dodge.
Strategy:
- Place the resulting void zones near the edges of the platform.
- Keep the central area as clear as possible for the later phases.
The placement of these void zones is particularly important because the arena becomes harder to navigate during the intermission and Phase 2.
Whirling Axes
Kindo’jan summons four axes that spin around the arena. Being hit by an axe deals heavy physical damage. The axes become more difficult to handle when combined with other mechanics, so learning their movement early is essential.
Strategy:
- Stand relatively close to Kindo’jan when the axes spawn.
- Watch their movement and move away as they travel around the room.
Keeping your movement controlled will give you more time to react when additional abilities overlap.
Hash’ey Command and Amani Headhunters
Kindo’jan summons four Amani Headhunters around the room. These enemies cast Axe Barrage, repeatedly creating circles beneath your character.
Strategy:
1. Stay relatively close to Kindo’jan after the headhunters spawn.
2. Wait for Whirling Axes to appear.
3. Once the axes begin moving, shift toward the center of the arena.
4. Deal with the summoned enemies while continuing to dodge the axes and ground-targeted attacks.
This approach reduces the need to chase enemies around the outside of the arena while dealing with dangerous moving hazards.
Crushing Blow and Amani Juggernaut
Crushing Blow creates a large frontal circle that deals heavy damage to anyone caught inside it. It also summons an Amani Juggernaut. The Juggernaut has two important abilities.
Fenix Charge
The Juggernaut targets a player and performs a charge after a short cast. The attack deals minor damage but knocks the target backward. The knockback is the main danger, as being pushed off the platform can end your attempt.
- Watch for the charge cast.
- Position yourself so the knockback does not send you off the platform.
Amani Aegis
Amani Aegis reduces damage taken by the Juggernaut and nearby allies by 33%. This ability can be interrupted.
Disgraceful Display: The Most Important Mechanic
Disgraceful Display is the encounter’s most punishing mechanic. Each time you are hit by an avoidable attack, you gain a stack of the debuff. At three stacks, the encounter ends immediately. You do not simply take extra damage or receive a dangerous debuff at the third stack. Kindo’jan removes you from the encounter entirely. So, avoid the avoidable attacks. Kindo’jan continues using these mechanics until his health reaches approximately 70%, at which point he disappears and the intermission begins.
Intermission: Four Loa Mechanics
During the intermission, Kindo’jan cannot be damaged. Instead, you must survive four mechanics in a fixed order:
1. Akil’zon
2. Halazzi
3. Nalorakk
4. Jan’alai
Each mechanic requires a different positioning or movement response.
Akil’zon: Wind and Safe Zones
Akil’zon creates strong winds that push you across the platform. At the same time, the arena is divided into eight sections: four safe sections and four sections that instantly kill you. The smaller sections were consistently safe.
Strategy:
- Identify a safe section of the arena.
- Position yourself inside it before being pushed into a lethal area.
- Move against the wind to maintain your position.
- Focus entirely on survival, since Kindo’jan cannot be damaged during this phase.
Correct positioning is essential because entering one of the lethal sections results in an immediate failure.
Halazzi: Four Cats and Binding Lines
Four cats appear and pin Valeera down using four separate lines. To free her, you must stand in one of the lines, breaking the connection and ending the mechanic.
Strategy:
- Identify one of the binding lines.
- Move into that line to break the connection.
- Avoid standing in multiple lines simultaneously.
Standing in multiple lines can spawn an additional enemy. Although this enemy is not particularly dangerous, avoiding unnecessary enemies makes the encounter easier to manage.
Nalorakk: Charging Bears
During Nalorakk’s mechanic, rows of bears charge across opposite sides of the arena, leaving gaps between them.
Strategy:
1. Begin near the center of the room.
2. Align yourself with a gap between the charging bears.
3. Allow the first row to pass.
4. Turn around and prepare to move through a gap from the opposite direction.
Pay attention to the openings between the rows rather than trying to outrun the charging enemies.
Jan’alai: Two Soak Circles
Two soak circles appear during Jan’alai’s mechanic. Valeera marks one circle and automatically stands inside it. Your task is straightforward: stand in the other circle to complete the mechanic.
Once all four intermission mechanics have been completed, Kindo’jan returns and Phase 2 begins.
Phase 2: Handling Overlapping Mechanics
Phase 2 combines Kindo’jan’s original abilities with the four intermission mechanics. He returns to the northern part of the platform, which may already be covered by the permanent void zones created during Phase 1. Kindo’jan can also move between areas of the arena, providing some additional space. However, the encounter becomes more difficult because the original attacks can overlap with any of the intermission mechanics.
For example:
- You may need to dodge Whirling Axes while navigating Nalorakk’s charging bears.
- Eruption of Mojo circles may appear while Akil’zon’s winds push you across the platform.
- You may need to enter a Jan’alai soak circle while an Amani Juggernaut prepares to charge you.
A Juggernaut’s knockback can push you out of a safe gap or away from a required soak circle. If possible, position yourself so the knockback moves you toward the area you need to reach.
Once you understand how the mechanics interact, Phase 2 follows the same basic pattern as Phase 1: manage enemies, avoid permanent ground effects, interrupt important casts, and survive the intermission mechanics until Kindo’jan is defeated.
4. Best Valeera Setup for Kindo’jan
Valeera is useful during this encounter, and the recommended setup depends on whether you prefer more healing or damage support.
Valeera Role
You can use Valeera as a healer if you want additional health sustain. Alternatively, choose a damage-focused setup that allows her to interrupt Ammani Aegis. Unlike Nemesis Delve encounters, this fight does not require a deadly interrupt or dispel. Choose the role that best suits your preferred playstyle.
Recommended Curios
|
Curio Type |
Recommended Curio |
Reason |
|
Damage |
Corrosive Bilespear |
Deals more damage than the alternative, Ouroboric Curse. |
|
Utility |
Soul-Cracking Dreamcatcher |
Recommended because the other utility options have little use in this encounter. |
|
Poison |
Bursting Toad Toxin |
Deals a significant amount of damage. |
5. Best Corrosive Powers for Kindo’jan
Corrosive Powers from the Vaults of Atal'Utek are effective against Kindo’jan. The recommended combination is:
- Ula’tek Gift: Use this as your primary Corrosive Power.
- Insidious Venom: Add this as your second Corrosive Power if you have unlocked the additional slot.
These two powers work well together, with Insidious Venom helping Ula’tek Gift ramp up faster. If you have access to both powers, this is the recommended combination for the encounter.
6. Kindo’jan Rewards and Achievements
Kindo’jan has a varied reward pool that includes a toy, titles, transmog rewards, and a mount. Several achievements are also tied to defeating the boss under specific conditions.
First Defeat Reward
Defeating Kindo’jan for the first time awards the Loa-Blessed Victory toy.
Kindo’jan Achievements
|
Achievement |
Requirement |
Reward |
|
First Hash’ey |
Defeat Kindo’jan inside his labyrinth. |
Loa-Blessed title |
|
Let Me Solo Him: Kindo’jan |
Defeat Kindo’jan solo on Tier 11 during Midnight Season 2. |
Loa-Blessed Wayfarer mount |
|
Labyrinth of Kindo’jan: One Champion Army |
Complete all nine chambers and defeat Kindo’jan solo on Tier 11 without losing a life. |
Lone Raider title |
|
Fabled Let Me Solo Him: Kindo’jan |
Defeat Kindo’jan solo on Tier 11 during the first reset in which he is available. |
Fabled Vanquisher of Kindo’jan title |
7. Final Words
Kindo’jan may be slightly easier than some Nemesis Delve bosses, but his mechanics remain punishing. A successful attempt depends more on consistent movement and positioning than on simply dealing damage quickly. With the mechanics understood and the recommended Curios and Corrosive Powers equipped, Kindo’jan becomes more manageable. Focus on surviving the overlapping attacks, maintaining good positioning, and avoiding unnecessary mistakes to complete the Labyrinth of Kindo’jan.