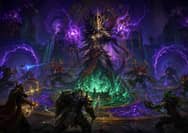
Ula’tek is the final boss of the Venomous Abyss raid in WoW Midnight Season 2. This three-phase encounter, with one major intermission, revolves around controlling eggs and preventing them from being exposed to venomous attacks. If handled correctly, the eggs can be crushed into weaker enemies. If they are exposed to poison effects, however, they hatch into much stronger creatures that can quickly overwhelm the raid.
The encounter combines tank positioning, egg management, add control, soaking mechanics, platform movement, and heavy burst damage. Understanding how to handle the eggs and Gore Rattles is the key to surviving the fight. How to defeat this boss? WoW So Zesty shared a guide on his YouTube channel. Let’s dive in.
Before stepping into Venomous Abyss, make sure your character is properly geared and stocked with the essentials. If you need extra gold for gear upgrades, consumables, or other raid preparations, you can buy WoW Gold from MmoGah and get ready for Ula’tek more efficiently.
Ula’tek Boss Fight Overview
The main mechanics to understand are:
- Egg Management: Pick up eggs and prevent venomous attacks from hitting them.
- Gore Rattle: Use the Gore Rattle's soak attacks to crack eggs and spawn weaker adds.
- Mother's Wrath: Tanks must correctly position themselves to avoid a raid-wide stacking debuff.
- Necrotic Vapors: A stacking soft-enrage that increases over time.
- Venomous Heart: The boss exposes her heart during Rage of the Shackled, creating an important burst-damage window.
- Caustic Waves: Avoid the waves and prevent them from reaching eggs.
- Doomscale Warden and Cauldron: During Phase 2, both raid groups must handle separate add and egg mechanics.
- Platform Destruction: Phase 3 progressively removes platforms, making positioning increasingly difficult.
Phase 1: Control the Eggs and Gore Rattle
At the start of the encounter, assign three players to pick up the initial eggs while the tanks move into position.
Mother's Wrath
Ula’tek will cast Mother's Wrath on the current tank. The ability knocks the tank back slightly and creates a red circle at the resulting location. The affected tank must move into the red circle and take the incoming hits from the boss. This applies stacking Stone Venom and Hobbled to the tank. This positioning is extremely important. If the tank fails to stand inside the red circle, the debuff is instead applied to the entire raid and receives additional hits, which can result in a guaranteed wipe.
Gore Rattle
During Mother's Wrath, a Gore Rattle spawns at the edge of the arena. The off-tank must immediately pick it up and keep it in position. If nobody is within range of the Gore Rattle for several seconds, it casts Rattler Slam, which wipes the raid. The Gore Rattle is not simply an add that needs to be tanked. It is an important part of the encounter because it provides the mechanics needed to safely destroy the eggs.
Spectral Coils and Egg Soaks
The Gore Rattle periodically creates Spectral Coils. Two ghostly versions of the creature appear on either side and slam down, creating soak zones in front of them. Players need to stand in these soak locations while bringing the eggs into them. When the slam hits an egg, the egg cracks and spawns a Blightscale Rawling. These adds are relatively weak and can be crowd-controlled and killed quickly. The danger comes from allowing an egg to be hit by one of Ula’tek's venomous attacks. Instead of producing a weaker Rawling, the egg hatches into a much more dangerous Blightscale Viper. One Viper may be manageable, but allowing multiple eggs to hatch this way can quickly become a wipe condition.
Gore Rattle Ring
After its slam mechanics, the Gore Rattle creates a large ring around itself. Everyone needs to move outside the ring. Players hit by the ring are launched a considerable distance, potentially causing serious positioning problems or death. Once the green ring disappears, the tanks perform their swap. The tank holding the Gore Rattle should move out and pick up Ula’tek, while the previous Ula’tek tank moves toward the Gore Rattle and takes over its position.
Necrotic Vapors
The first phase has a soft enrage called Necrotic Vapors. This is a stacking debuff applied to the raid that continues increasing as the fight progresses. Groups therefore need to push Ula’tek through the phases efficiently rather than allowing the encounter to drag on indefinitely.
Shared Damage
Ula’tek's different targetable components share damage. This includes Ula’tek herself, the Gore Rattle, her Venomous Heart and other targetable body parts. Damage dealt to these targets is partially transferred to the main boss. Because of this, players do not need to worry excessively about which Ula’tek target they are attacking. Whenever possible, cleave and multi-target abilities should be used to damage several parts simultaneously.
Rage of the Shackled
Periodically, Ula’tek begins Rage of the Shackled. Large amounts of debris fall around the arena, dealing massive damage to anyone caught underneath them. Avoid these falling hazards carefully.
At the same time, Ula’tek's Venomous Heart becomes exposed. The heart takes 100% increased damage, creating a major burst window. The raid should immediately focus on the heart and use its strongest damage cooldowns.
At all times, at least one tank must remain within range of Ula’tek. If nobody is within her range, she casts a raid-wiping ability. Even while dealing with eggs, Gore Rattles, or other mechanics, make sure the boss remains engaged.
Caustic Waves
Ula’tek periodically casts Caustic Waves. She winds up on either her left or right side before releasing a series of poisonous waves in that direction. These waves are particularly dangerous because they can hit eggs and cause them to hatch into Blightscale Vipers. The raid should therefore:
- Pick up eggs whenever they spawn.
- Keep eggs away from venomous effects.
- Watch which side Ula’tek is preparing to attack.
- Move the eggs away from the incoming waves.
- Avoid the waves while maintaining control of the eggs.
Ula’tek releases two sets of waves during the mechanic. The tank holding the Gore Rattle is generally responsible for absorbing the waves that come toward them rather than allowing them to reach the eggs.
The overall goal throughout Phase 1 is simple: protect the eggs from venomous attacks and bring them to the Gore Rattle so they can be safely cracked into weaker adds. After several rotations of these mechanics, Ula’tek moves into Phase 2.
Phase 2: Split the Raid and Handle the Doomscale Adds
Ula’tek dives into the acid, and two spectral versions of the boss appear. These open paths on the left and right sides of the arena. The raid must split into two groups, with players assigned according to odd/even groups. Each side should have a balanced composition of Tanks, Healers and DPS. Both groups will have to complete their mechanics independently.
Doomscale Warden
A Doomscale Warden appears on each side along with a Doomscale Cauldron. The tank should pick up the Doomscale Warden and move it toward the northern path leading deeper into the area. You will find a group of eggs there that need to be disrupted and collected. A larger egg will also appear at the end of the path, which another player needs to pick up. Once the eggs have been collected, kill the Doomscale Warden.
Doomscale Cauldron
After the Warden dies, bring the collected eggs to the Doomscale Cauldron and throw them inside. The cauldron causes the eggs to spawn minions that must be defeated. One of the resulting enemies is a larger weakened Doomscale. The tank should pick it up and move it away from the group because it uses a dangerous frontal cone attack.
Avoid the falling debris and green ground effects throughout this section. Both sides need to complete their add mechanics and defeat their enemies before returning to the center.
Return to Phase 1 Mechanics
Once the enemies on both sides have been defeated, both groups swim back toward the center. Ula’tek resumes her Phase 1 mechanics, so the raid needs to return to the same strategy. Ula’tek should perform Rage of the Shackled again, providing another opportunity to heavily damage her exposed heart. After this damage window, the encounter moves into the intermission.
Intermission: Collect Eggs and Soak the Tentacles
During the intermission, the entire raid should group in the center. Multiple egg spawn locations appear around the room. Players need to move quickly around the arena and pick up all the eggs. Next, look for the ghostly tentacles that appear around the room. When the first slam location appears, the raid needs to move together and soak it. The soak spawns a group of adds that must be quickly controlled and killed. The raid then moves to the next slam location and repeats the process. After completing the sequence, return to the center.
Phase 3: Platform Survival
Ula’tek erupts from the center of the arena, destroying the middle and leaving four platforms connected by jump paths. Players are slow-falled onto the platforms and should prepare for the final phase. Ula’tek appears on one of the platforms. The raid needs to quickly reach her location, with melee DPS jumping over and the tanks establishing threat.
Phase 3 changes how eggs are handled. Instead of protecting the new eggs, ranged DPS should immediately attack and destroy them. The eggs spawn small adds, which need to be killed quickly. Keep these enemies interrupted whenever possible.
Green Orbs and Red Circles
Players will periodically receive red circles. Anyone targeted by the red circle needs to move away from the rest of the raid. These players receive a green orb above their heads that deals pulsing damage to nearby players. The orb can also empower eggs that remain alive on the platform, making fast egg control even more important. While dealing with these mechanics, maintain constant damage on Ula’tek and use cleave damage to burn down the spawned minions.
Caustic Waves in Phase 3
Ula’tek eventually channels another ability that creates green orbs around the arena. Watch the openings between the effects carefully. Caustic Waves will shoot through the available paths, so the raid needs to identify the safe area and move into it. Because the available space is already limited by the platforms, positioning becomes increasingly important during this phase.
Platform Destruction and Final Rotation
A ghostly tentacle eventually appears in the middle of the arena and slams down, destroying the platform Ula’tek lands on. The raid must immediately identify a new platform and move there before the current platform is destroyed. Ula’tek then appears at another location, requiring the raid to rotate again.
The available space becomes progressively smaller as platforms are destroyed. This makes it increasingly difficult to manage the eggs, adds, red circles, and movement mechanics simultaneously. At this point, clean execution and fast add control are essential.