The Unlucky Council is one of the more unusual hidden challenges in Diablo 4 Season 15. Defeating the Council rewards the Horadric Coin. In this guide, we’ll walk you through how to unlock the Unlucky Council, the best boss kill order, each boss’s key attacks, and how to survive the most dangerous group mechanics. You’ll also learn how to get and use the Horadric Coin after defeating the Council.
1. Unlock Requirements
To access the Unlucky Council, you first need to collect the complete Unlucky Jewelry Set:
- Amulet of the Dark Omens
- Ring of the Jinx
- Ring of Misfortune
The Ring of the Jinx requires the Locker Coin, which you must take to the Most-Cursed Grave in Nahantu. For more details, check our Diablo 4 Lucky Coin Quest Guide.
Once you have all three pieces, equip the complete Unlucky Jewelry Set and follow these steps:
- Teleport to the Lair of the Beast in Ice.
- Exit the area and head west.
- Continue until you reach Windswept Cabin.
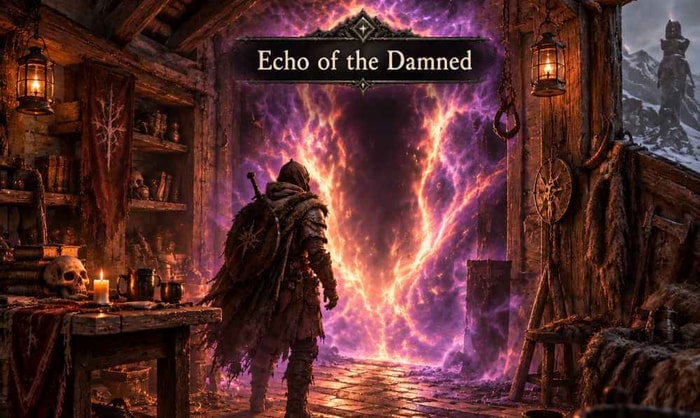
- Find the portal leading to Echo of the Damned.
- Enter the portal to reach the Unlucky Council encounter.
Note: The portal only appears when all three pieces of the Unlucky Jewelry Set are equipped.
2. How to Start the Unlucky Council Fight
Inside Echo of the Damned, you will find the echoes of Donan, Neyrelle, and Lorath preparing to summon something.
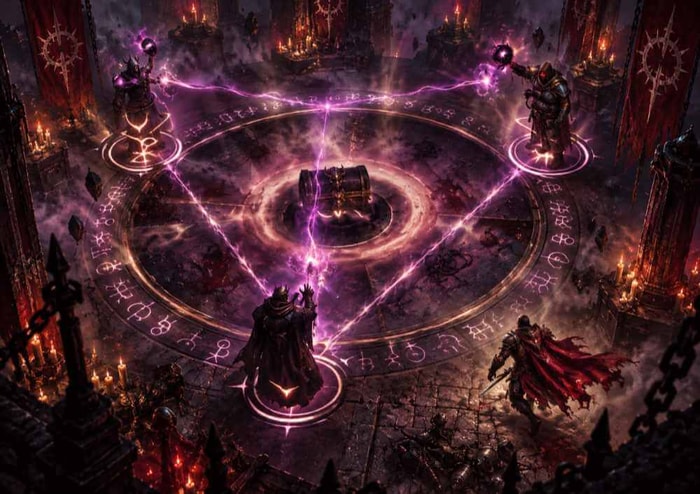
Open the door and enter the arena. You will see a chest in the center. The fight does not start immediately. You need to step into the central circle to trigger the encounter.
Once the fight begins, all three members of the Unlucky Council will attack you.
3. How to Beat the Unlucky Council
The biggest challenge in this fight is that the Unlucky Jewelry Set can severely disrupt your normal build. Two effects are especially important to prepare for.
Cursed Jewelry Effects
The first problem comes from the "The People of Sanctuary Reject You" affix on the Amulet of the Dark Omens. During the fight, an NPC will throw tomatoes at you. If a tomato hits you, you will be knocked down for several seconds.
The easiest way to avoid this effect is to become Unstoppable. For example, Warlocks can use Metamorphosis to gain Unstoppable.
The Ring of Misfortune creates another major problem because it has a 100% chance to remove your Resource. This can completely disrupt Resource-dependent builds.
Before starting the fight, make sure your build can still function with limited Resource. You can either use Basic Skills for damage, build around fast Resource generation, or create a Resource generation and spending loop.
Best Boss Kill Order
The recommended kill order is: Donan → Neyrelle → Lorath.
Donan should always be your first target because he provides powerful buffs to the other two bosses.
Need to improve your build before the fight? Check out the Diablo 4 Items for gear to help optimize your character.
Donan
Donan is the first boss you should focus on.
He can:
- Give the other bosses a powerful shield.
- Increase their damage.
- Create a large shadow damage-over-time area around himself.
Because of these buffs, leaving Donan alive for too long makes the entire encounter much more dangerous.
Focus your damage on Donan whenever you have a safe opportunity.
Neyrelle
Neyrelle mainly fights at melee range and can deal heavy physical damage.
She can also become invisible, making her more difficult to track during the fight.
Keep moving when she approaches and avoid allowing her to stay close to you for too long.
Lorath
Lorath is the ranged caster of the Unlucky Council.
His attacks may look slow, but they can deal heavy damage.
One of his main attacks creates up to five purple orbs above him before firing them toward you. These projectiles deal Shadow Damage, so move away as soon as you see the orbs appear.
Lorath can also create purple ground zones with triangle markings. Avoid standing inside these areas because they can deal heavy damage.
Another attack creates a moving triangle that follows your character. If it touches you, you become vulnerable, making you much easier to kill.
4. How to Survive the Council's Group Attacks
The most dangerous part of the fight is when all three members of the Council attack together. Donan, Neyrelle, and Lorath move to different corners of the arena and form a large triangle.
Once they form the triangle, the attack cannot be interrupted, so your priority should be surviving the mechanics.
There are three types of group attacks:
Frost Ball
The first group attack summons a massive Frost Ball that fires ice projectiles in different directions across the arena. These projectiles deal heavy damage, so keep moving and avoid their paths.
Purple Beam
The second attack creates a small triangle inside the larger triangle. A purple beam then appears and follows your character. The beam moves slowly, but being hit can be fatal. Keep moving and avoid crossing through dangerous areas.
Shadow Projectiles
During the third group attack, one member of the Unlucky Council fires Shadow projectiles at you.
This attack is generally easier to survive because only one boss directly attacks you at a time. Minion-based builds can also benefit because their minions may draw some of the incoming attacks.
When the Council begins its group attacks, run from one side of the arena to the other while following the bottom edge of the triangle. Do not run directly through the middle of the triangle.
Keep these points in mind:
1. Never touch the purple triangle lines.
2. Watch out for furniture and other obstacles.
3. Avoid getting trapped against objects while moving.
4. Practice the movement pattern before focusing on damage.
Once you learn this movement pattern, you can significantly improve your chances of surviving the Council's deadliest attacks. You can also use this phase to revive fallen teammates if you time your movement correctly.
One more thing to watch out for: Donan and Neyrelle can still attack even after they have been defeated. They may no longer follow you around the arena, but approaching them can trigger another attack, and they can still participate in group attacks. Keep an eye on their positions instead of treating defeated bosses as completely harmless.
5. How to Use the Horadric Coin
The Horadric Coin is a special reward from the Unlucky Council encounter. After defeating the final member of the Council, you can receive the Unlucky Player title, additional loot, and the Horadric Coin.
Once you obtain the Horadric Coin, take it to the Horadric Cube to craft the Sack of Ill Trinkets.
Crafting Recipe:
- 1 × Horadric Coin
- 2 × Engagement Rings
- 1 × Lost Amulet
The combination produces the Sack of Ill Trinkets.
After you get the Sack of Ill Trinkets, go to Squirt the Peddler at Temis. Like the Outcast Travel Pouch, you can buy the Sack of Ill Trinkets from the vendor.
This provides an easier way to obtain the Unlucky Jewelry Set for another Unlucky Council attempt.