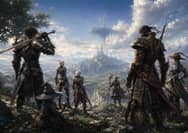
Overview
Sortie, a new party-based battle mode introduced in the August 2022 update, allows between one and six players to venture into a massive maze packed with enemies. Players advance in this mode through a different region of Outer Ra'Kaznar.
Objectives
Sorties' primary goal is to achieve the Hidden Objectives. Sortie's hidden objectives vary in difficulty and what you're rewarded with for completing them, depending on the area you're in. You will be able to view an ongoing status report of your progress for hidden objectives. This report will show you how many hidden objectives you have already finished and how many hidden objectives you still need to finish. When certain goals are reached in Sortie, a treasure box will appear, and a message will be posted to the group's chat log to update them on their progress.
When you have finished a specific number of secret objectives, chests carrying rewards will emerge. These chests will include things that you can add to your personal loot pool. There will be a total of 28 hidden objectives in Sortie, in addition to an additional aim to acquire Aurum Coffer. Each sector contains seven hidden objectives; therefore, the overall number of hidden objectives will be 28.
In Sortie, there are three distinct kinds of chests, plus one unique "Aurum Coffer" that can randomly appear in any area of the map. You should know that everyone in your group will get the same loot from the chests, regardless of whether or not they match the XP requirements.

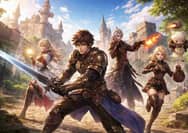
Party Setups & Buffs
This guide will assist you in surviving the fights against all four bosses, allowing you to free up sufficient time for farming the various chests and Gallimaufry. Since there might be anywhere from one to six participants in a Sortie, the optimal arrangement might look something like this: RUN, BLU, SCH, WAR, BRD, and COR. As soon as you step through the door, COR will be eager to immediately set up Bolter's Roll. BRD will receive two marches and two ballads, while SCH will receive AoE Protect/Shell, Perpetuate Regen, and Phalanx will also be a welcome addition to their arsenal.
Things To Note Through the Progression
It is essential that you clear all areas (A, B, C, and D), including battling the NMs (Notorious Monsters), before proceeding to the Boss Cycle and engaging in direct combat with these bosses.
Notorious Monsters are extremely hazardous creatures that are typically one of a kind. This is due to the fact that there will typically only ever be one of them in a given place. In most cases, they are significantly more powerful than the other monsters that can be found in the area. Although there are many valuable items that can only be acquired by vanquishing Notorious Monsters, this is not the case for all of them.
This is especially true with respect to Notorious Monsters that are created as a result of quests and missions. These monsters frequently do not drop anything at all, despite the fact that they must be battled in order to finish the quest.
The Boss Cycle
To begin, you will need to head in the direction of your starting place, which is located in the southwest corner of the map. There, you will have your first encounter with Degei. After that, you are going to run all the way to Ghatjot, who is located in the north. (This is the point where the Bolter's Roll becomes crucial.) After that, you will continue forward toward the eastern side, where you will confront the third boss, Leshonn (found on the North East part of the map). Finally, you will make your way down to the southeastern part of the map, gathering shards and metal along the way in preparation for the last boss fight against Skomora.
Bear in mind that there will, in fact, be a lot of running, but that is exactly when the Bolter's Roll comes into action. It is essential to gather behind the doors before engaging the NM, as as soon as you do so, the door will close automatically, trapping any members of your team who are standing behind it.
It is now time for you to use Clarion Call and Soul Voice Nitro since the first two NMs will be eliminated with just one song duration cycle of the song being played. You will need to reapply songs without Nitro on the third NM unless you obtain a lucky wild card. Because you will need to farm before taking on the final NM, your Barb will just perform the song application by ear at that point in time.
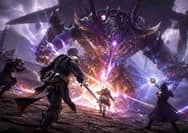
Dejei – The First Boss Fight
Regarding the actual boss fights, each one adheres to the standard gameplay mechanic of the modern era, which consists of repeatedly using Savage Blade to kill the boss as quickly as possible. It is important to note that we begin with this boss because it is the one that causes the most trouble on average. Because of this, our Warrior can use Mighty Strike, and our Blue Mage would be spamming Sudden Lunge, which will very effectively stun all of the NM's except for Leshonn because he is a thunder-based. Aside from that, you should be good to go in all the other parts.
Stick to the tips given above for Degei, and you will be good to go; however, avoid healing him, and blue proc, as weaknesses change after every move.
Ghatjot
After you have dealt with Degei, you will need to Bolter Roll all the way to Area A, where you will locate Ghatjot. He will be waiting for you there. It is not necessary to reapply buffs at this point; nevertheless, you will need to wait before entering the room to confirm that everyone has passed through the entrance. Then, once the battle has been initiated, utilize the same strategy as before, with the exception that this time you should focus on spamming him and using the auto-attack. Be careful to avoid Darkness SCs and Water Damage.
Leshonn
After that, you must perform the Bolter Run to Leshonn, the boss of Area B. At this point, it is really necessary to reapply those Nitro Songs. For optimum damage, you should utilize the Savage Blade here in conjunction with the Barbed Cresent and the Circle Blade. After that, you'll need to make your way south to the skeletons, where you'll be able to farm right next to Gadget C.
Your Rune Fencer is going to be tasked with collecting six skeletons for this section. It is recommended that these skeletons carry clubs and shields because they do not perform magic; nevertheless, the decision is ultimately yours to make. After that, he is going to herd them over to the corridor that is located next to the Gadget so that they can teleport to the boss.
Farming Before Fighting The Last Boss
The objective here is to complete Skill Chains against each of these six enemies using Magic Bursts, and as soon as you have used a burst on a particular enemy, you can kill it and move on to the next one. The quickest method to accomplish this as a Blue Mage is to start with Red Lotus Blade, close with Flat Blade, and then finish off with Magic Burst, which deals a few points of damage on top of that. If you are acquiring TP at a sufficient rate, you can finish off a Light Skill Chain with Savage Blade and, in most cases, wipe out all of your opponents.
After completing this task a total of six times, two chests will appear, each containing the metal and the Shard necessary to defeat the boss.
You can also purchase FFXI Gil from MmoGah if you wish to avoid the grind and purchase bigger and better weapons and armor for all of these bosses mentioned in the list above cause you will definitely need them. As a professional online game store, we’ve got you all covered!
Skomora
Now we face Skomora, the final boss, who can be found in Area C. Playing out wide is a helpful strategy because the boss's opening attack is an AoE one. Even while Sudden Lunge is not as effective against this boss as it was against earlier bosses, it is still not a bad idea to pull the trigger on it every once in a while. You shouldn't have too much trouble with this boss, and after you've vanquished them, the game will be over. You should now make your way back to Area C to rematerialize the monsters' wide search for The Ghost. Once you have located and killed The Ghost within the allotted amount of time, you will be able to obtain the red chest and will be able to reapply the songs as you do so.
This guide is structured in such a way that its primary focus is on outlining which path to take, with the goal of allowing you to finish it quickly and go on to other activities, such as farming or adventuring.