The Speed Ward Ball Blaster—a hybrid of Ball Lightning, Hexblast, and a fully automated Ward Loop engine—is one of the fastest and most explosive mapping builds available in Path of Exile 3.28: Mirage. Designed specifically for card farming, this build prioritizes movement speed, instant ward recovery, and massive screen‑wide explosions while maintaining surprisingly strong defenses for a loop build.
This guide distills the full logic, mechanics, and gearing philosophy behind the build, based directly on the creator’s spoken explanations. If you want a build that clears juiced maps at breakneck speed, scales infinitely with investment, and feels like piloting a lightning tornado strapped to a jet engine, this is the one.
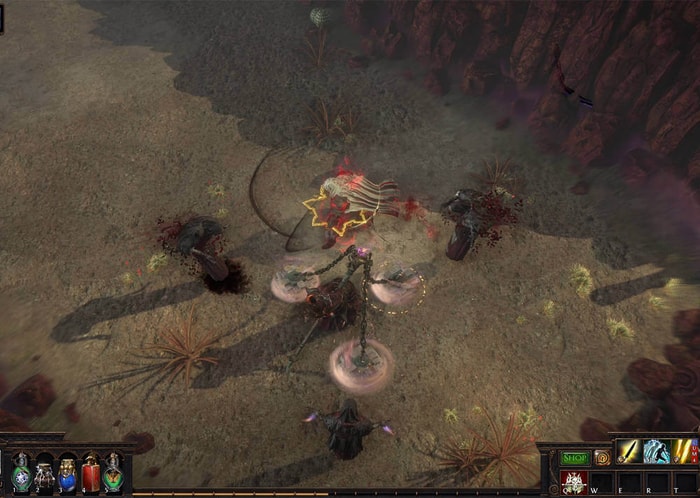
1. What This Build Is Designed For
The Speed Ward Ball Blaster is optimized for:
- High‑density card farming (e.g., 80% Delirium, Scarabs, Ritual, Expedition)
- Extreme movement speed stacking
- Automated damage via Ward Loop
- High AOE and Herald explosions
- Comfortable tankiness despite loop self‑damage
The creator emphasizes that while you can build it tankier or stronger, the version presented is tuned for maximum speed, and Pathfinder is chosen specifically for that purpose.
2. Ward Loop: How the Engine Works
Ward Loop builds are expensive and mechanically demanding, but once set up correctly, they become self‑sustaining engines that trigger spells dozens of times per second.
Core Components
- Heroic Tragedy Timeless Jewel
- Must roll Regenerative Runes.
- These grant Iron Flask charges when Ward breaks.
- Using the flask instantly restores Ward → enabling the loop.
- Cast on Ward Break Support
- Triggers linked minions when Ward breaks.
- Hardbound Loop Ring
- Causes you to take damage when your minions die.
- This damage breaks Ward again → restarting the loop.
- Enough Ward
- More Ward = shorter cooldown on Cast on Ward Break.
- Intelligence stacking + Faithguard helmet massively boosts Ward.
The Loop Cycle
- Ward breaks
- Minions are triggered
- Minions die → deal damage to you
- Damage breaks Ward again
- Iron Flask restores Ward
- Repeat 10–15 times per second
This loop also triggers your Ball Lightning of Static and Hexblast of Contradiction, giving you both persistent and burst damage.
3. Scaling the Build: Why Intelligence Rules Everything
The entire build scales from Intelligence:
- Giani Staff: huge flat lightning damage
- Simplex Amulet: % increased damage
- Faithguard Helmet: Intelligence → Ward scaling
- Ward scaling reduces cooldowns on Cast on Ward Break
- More Ward = faster loop = more DPS
Intelligence also boosts:
- Damage
- Ward
- Clear speed
- Survivability (via more consistent loop uptime)
This is why nearly every gear piece, cluster jewel, and passive point is dedicated to stacking Intelligence.
4. Pathfinder Ascendancy: The Speed Choice
While other ascendancies can run Ward Loop, Pathfinder is unmatched for:
- Flask effect
- Flask uptime
- Movement speed
- Stun immunity
- Elemental ailment immunity
- Resistance capping
- Flask charge gain scaling
Since the build requires 172% increased flask charges gained (with 4 regenerative runes), Pathfinder is the most efficient way to reach the threshold.
5. Countering Build‑Disabling Mechanics
Ward Loop builds have two natural predators:
1. Delirium’s “Reduced Flask Charges Gained” Debuff
-
- Stacks up to 90% reduced.
- Without overcap, your loop stops → you die instantly.
Solution: Overcap to 172% even if your jewel has 6 regenerative runes.
2. Flask Siphoners
-
- Monsters that disable flask charge gain entirely.
- This doesn’t kill you directly, but anything else hitting you during that window will.
Solution: Get Vorana on your Heroic Tragedy jewel. This prevents self‑damage deaths and grants high attack avoidance.
6. Damage Over Time Mitigation
DoT is one of the few things that can kill this build. The guide recommends:
- Olroth’s Boon of the Mountain (from Expedition)
- Soul of Arakali major pantheon
- Flask mastery: recover 4% life on flask use
- Life Recoup on ring
- Cannot be Poisoned corruption or Soul of Shakari
- Corrupting Blood immunity on Abyss jewel
These layers ensure you survive even in 80% Delirium maps.
7. Passive Tree, Tattoos, and Jewels
The passive tree is heavily optimized for:
- Intelligence
- Flask charge gain
- Jewel sockets
- Ward scaling
- Movement speed
Key Components
Impossible Escape (Wind Dancer)
Saves a huge number of points.
Rune Grafts
- Rune Graft of Time → 20% more damage + life recovery
- Rune Graft of the Agile → Withering Step speed
Movement Speed Tattoos
Replace Dexterity travel nodes.
Forbidden Flame + Flesh
- Grants Gathering Wind → permanent Tailwind
Haste Sublime Vision
More speed.
Foul Witchbane
Extra explosions.
Cluster Jewels
You need:
- 3 Large Clusters (Elemental Damage, 35% effect, Intelligence)
- 4 Medium Clusters (Herald effect + flask charge gain combos)
Notable combos include:
- Fasting + Assert Dominance
- Spite Concoction + Assert Dominance
- Fasting + Blessed Rebirth
- Fasting + Life from Death
Crafting these is expensive—expect to spend significant PoE Currency if you want perfect suffixes.
8. Ward Loop Setup: Skeletons + Falling Zombies
To maintain a stable loop at high speed, the creator uses:
Summon Skeletons
- Requires five “To Dust” jewels
- Total 99% reduced skeleton duration
- They die instantly → retrigger loop
Raise Zombie of Falling
Zombies fall from the sky and die on impact.
They solve two problems:
- Withering Step sometimes avoids self‑damage → loop breaks
- Rune Graft of Time can cause cooldown desync → zombies re‑sync the loop
Ward Breakpoints
Endgame (15 procs/sec):
- 28,400 Ward
- 5 To Dust
- 20/20 Less Duration
- Swift Affliction
Budget (10 procs/sec):
- 18,300 Ward
- 5 To Dust
- 20/20 Less Duration
- No Swift Affliction
9. Tips for Reaching Ward Requirements
If you’re short on Ward:
- Drop explode jewel for ES nodes
- Use Stone Golem temporarily
- Use ES tattoos
- Add cooldown recovery implicit on boots
- Optimize Faithguard rolls
10. Permanent Minions: Spectres, AG, Golem
Spectres
-
- Perfect Spirit of Fortune
- Grants Wrath + Lucky Lightning
- Extremely tanky
- Perfect Pain Artist
- Grants Zealotry
- Squishy and may die in juiced maps
- Perfect Spirit of Fortune
Animate Guardian
Recommended gear:
-
- Kingmaker
- Crown of the Tyrant
- Legacy of Fury
- Doppelgänger’s Guise
- Rare gloves with resistances
Golem
-
- Flame Golem for AOE
- Stone Golem if you need more Ward
11. Gems and Links
Highlights:
- Swift Affliction is easy to imbue
- Haste 21/20 Eternal Blessing gives more speed than imbued level 1
- Herald of Ice + Arrogance for low life
- Ball Lightning ideally imbued with Cruelty or Hypothermia
- Hexblast level 1 for faster uptime
12. Gear Overview
Belt
-
- Most impactful Ward slot
- Perfect roll ideal but not mandatory
Body Armour
-
- Triple T1 prefixes
- Intelligence + AOE are essence mods
- Can fracture one or use veiled Intelligence
Gloves
-
- Must have 30% less life cost of skills on low life
- Comes from Mirage exiles → recombinate onto Ward base
Boots
-
- Abyssal socket recommended
- Look for:
- Corrupting Blood immunity
- Intelligence
- Movement speed
Rings
-
- Hardbound Loop: resistances + % Intelligence
- Helical Ring: conductivity on hit + recoup
Helmet
-
- +2 duration gems
- Shock effect implicit
Weapon
-
- Giani Staff
- Ideal: 10% lightning modifier effect + good corruptions
13. Flasks
You need:
- Two Iron Flasks
- One must be item level 84 for T1 charge recovery
- One must be item level 78 for T1 Ward
- Chance to freeze/shock on the charge recovery flask
- Increased Ward on the second flask
Flasks are the heart of the loop—optimize them carefully.
Conclusion
The Speed Ward Ball Blaster is a high‑investment, high‑reward build that delivers unmatched mapping speed and explosive clear. While it requires careful setup and significant currency, once complete it becomes one of the most satisfying and visually spectacular builds in Path of Exile.
If you enjoy zooming through juiced maps, detonating entire screens with Herald explosions, and piloting a build that feels like controlled chaos, this is the perfect choice for 3.28 Mirage.