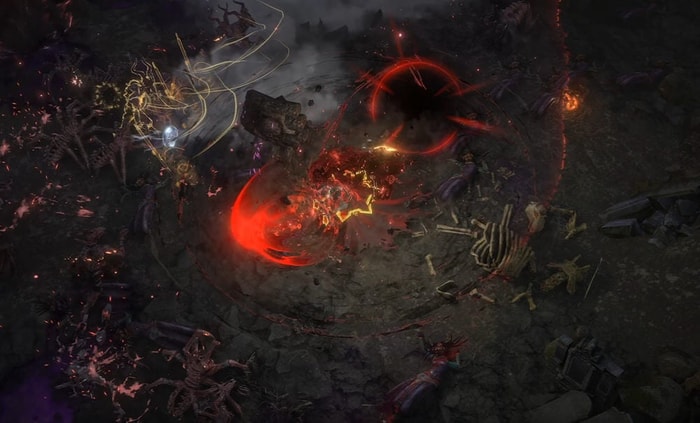
This is PhazePlays' fantastic mapper build with enormous damage. With the transfigured version of Ground Slam, it can provide screen-wide coverage!
For a Bleed Slam build, they use Static Strike and Vulnerability to aggravate bleeding, then Rallying Cry for a damage buff. After that, spam your slam to get the bleed rolling. If you're still struggling to find Ground Slam of Earthshaking, you can swap to Sunder, which is also good for penetrating Hive Fortress defenses.

Ubers
It turns out this build is incredibly strong. It's easily one of the best solo self-found bosses, and it's an incredibly smooth mapper. I comfortably killed all 10 Uber bosses in Hardcore SSF, and honestly, I never once felt at risk of dying. I tanked up to be on the safe side, so damage can easily be much higher than what's shown. Damage felt fantastic. Damage mitigation felt higher than any build I've played in years. Recovery is phenomenal, and the guaranteed damage uptime is great for bossing since it lets you focus on dodging mechanics.
Cluster Jewels
For a melee build to really feel good, attack speed is very important, especially a bleed build that typically uses weapons on the slower side. So, late game, it's highly recommended to go two Large Clusters for a huge chunk of attack speed and damage. Two clusters close the speed gap a bit between Slayer and Berserker.
Area of Effect
Coupled with the build's huge AoE coverage, it feels really nice for mapping. Area of effect pairs very well with Grand Slam. Some sources of AoE include Brinkmanship, Executioner, Awaken Increased Area of Effect, and Pulverize. Maces with a Coronal Maul are also an attractive option for an extra 82% area of effect.
War Banner & Runegraft of Treachery
The better your weapon and gear, the more you can sacrifice some damage for AoE. After some in-game testing, War Banner interacts in a very bad way with Runegraft of Treachery. It makes enemies deal far more physical damage while the War Banner is down. Be sure never to combine War Banner with this Runegraft unless you have a death wish. On the plus side, this also makes the single-target rotation a bit easier.
Sunder vs Ground Slam
A common question is: When do I swap from Sunder to ground slam? Sunder performed extremely well at low gear levels, mainly due to the shock waves. So, it's generally recommended to stay sunder until you have an 800-plus DPS axe or you get ground slam of earthshaking.
Grafts
The grafts to aim for are Seized the Flesh and Heart of Flame. Seize the flesh places many spikes on the ground, and they explode after you exert an attack. Spikes can even be pre-stacked for bosses. These do incredible damage, especially with pride and vulnerability. Heart of Flame is a fantastic defensive graft. It puts a huge shield on you that absorbs 80% of damage taken. It basically doubles your life pool. Combine this with the mastery that considers you full life above 90% to prevent blood rage and other chip damage from triggering it. It essentially functions as a far more powerful cast when damage is taken, molten shell. If maximum damage is preferred, Heart of Flame can be replaced with Return to Dust or, more aptly described as the Fist Slammers.
4th Ascendancy
For the fourth Ascendancy, Impact is taken early on as it gives us some nice mapping AoE and a bit of damage. But there are two other solid options – "Otherworldly Appendages" is from the breach lord bloodline. It's unlocked by defeating the breach boss Tul. Access them by placing a Hivebrain Gland in the map device. With the graft setup, we'll take 15% less physical and fire damage, along with extra graft damage. This is a good intermediate defensive option and can be useful to run to unlock the next Ascendancy – "That didn't happen!". In softcore, this can be solid for difficult map choosing strategies or learning bosses. In hardcore, it's always fantastic. This thing is crazy good. The aftershock damage is barely even noticeable, with overleech and taking 40% less damage, making armor so much stronger. Unlocking it in Simulacrum can be tricky. With good gear, it's not too bad. It felt pretty safe when I did it in hardcore. Use Sunder as it excels with the extreme monster density. For flasks, run jade, granite, and triple resistance flasks. Consider unspeaking iron reflexes and unwavering stance if you have them. It may be worth swapping out pride for the purity of elements if a wave has dangerous elemental elements like brittle.
Summary
Overall, this build is a well-rounded beast and has a very enjoyable screen-wide clearing playstyle. Any enemies you touch will bleed out. In softcore, consider playing this build with a huge area of effect setup, possibly with maces. In hardcore, I'd recommend the typical axe setup, then later transition to a didn't-happen setup for absurd tankiness. Softcore or hardcore, SSF or trade, you really can't go wrong with bleed slams.


