This guide, shared by Hector Lecture on his YouTube channel, covers the full AAC Heavyweight M12S (Lindwurm) encounter, focusing on clear role responsibilities, Party Finder–friendly positioning, and step-by-step resolutions for each major mechanic. Let's dive in. As always, if you want a quicker way to clear this tier, MmoGah offers FFXIV Boost service for the AAC Heavyweight Savage tier, which is easy and hassle-free.
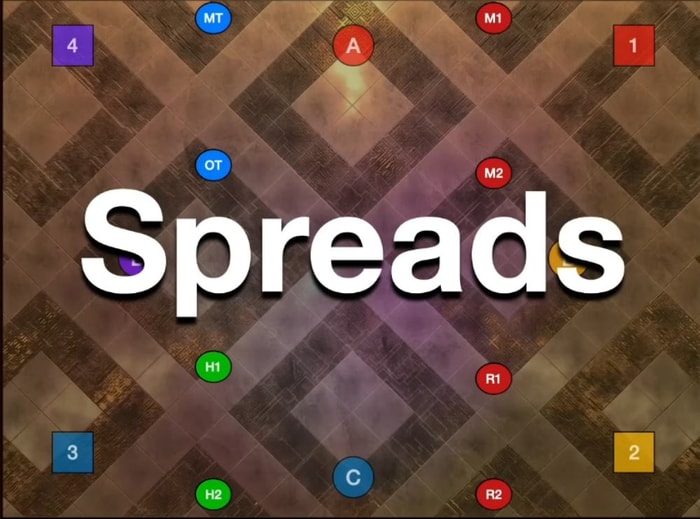
General Positioning
This fight primarily uses spread positions. These are role-based, mirrorable, and ordered from north to south. Some mechanics may require minor adjustments to dodge Chrono Cleaves or to preserve melee uptime, but the base spread order remains consistent.
Opening: The Fixer
The fight begins with The Fixer, a very heavy-hitting raidwide AoE.
- Mandatory heavy mitigation
- Under-mitigating will result in deaths
Mortal Slayer
Lindwurm summons eight hands (four per side) and casts Mortal Slayer.
Orb Types
- Green Orbs – Spread AoEs (any role)
- Purple Orbs – Tank busters (tanks only, heavy mitigation required)
Rules:
- Always 2 purple + 6 green
- Orbs spawn two at a time
- Can be both on one side or one per side
- The orb targets the nearest player to the boss hitbox on that side
Tank Assignments
- Main Tank → First purple orb
- Off Tank → Second purple orb
Green Orb Order (Conga Line)
- H1 – First green (left)
- H2 – First green (right)
- M1 – Second green (left)
- M2 – Second green (right)
- R1 / R2 – Third & fourth green on the side with four orbs
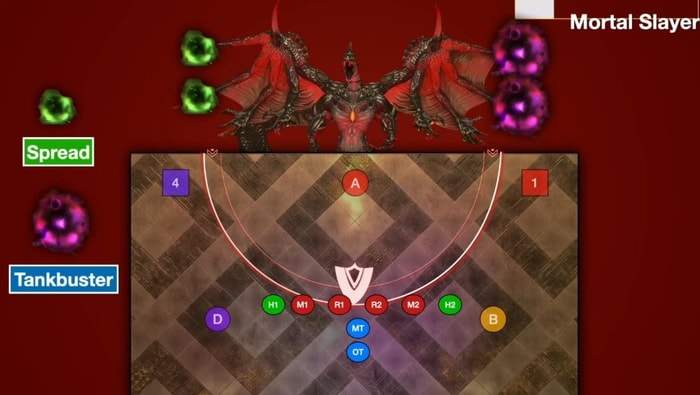
Execution Tips
- First players stand against the wall
- Second players stay on deck, inside the hitbox, but not on the wall
- Others wait outside the hitbox
- After exploding, players move outward toward the corners
- Next player slides in like a conveyor belt
Edge Case:
If a purple and green orb spawn simultaneously, the outer orb goes to the innermost player. Tanks must adjust positioning to avoid mis-targeting.
Post–Mortal Slayer
- Group northwest
- Loose spread
- Prepare for Grotesquerie: Act 1
Grotesquerie: Act 1
Debuffs Overview
1. Purple Growth Debuff
- Indicates a directional cleave
- Cleave direction rotates with the player facing
2. Stack Debuff: Always on one role
3. Spread Debuffs: On the opposite role
Puddle Baiting
- Stack tightly
- Bait 4 puddles: First 3 along the north wall, and the 4th swerves inward near the hitbox arrow
During the third puddle, Lindwurm begins Ravenous Reach.
Ravenous Reach Resolution
- Watch the dragon's head direction: Straight down or diagonal
- Dodge to the safe side
- Resolve the stack in the corner
- Turn cleaves outward — mis-aiming will kill teammates
After resolution:
- Tanks move away
- Party stacks on one side
- Blobs drop + tank busters + stack
- Tanks run in opposite directions
- Tankbusters can be stacked with sufficient mitigation
Mitigate another Fixer afterward.
Grotesquerie: Act 2 (Most Complex Mechanic)
Debuffs
- Alpha / Beta pairs
- When the timer expires → tether forms
- Break the tether by running opposite
- Break causes:
- Spread AoE
- Magic Vulnerability
- Tower spawning under Beta
Tower Rules
- Alpha players soak boss-dropped towers
- Beta players soak towers from tether breaks
- Order for both: 3 → 4 → 1 → 2
Simplified Role Logic
Alpha Players
- Alpha 3 & 4: soak blob towers first
- Alpha 1 & 2: break tether first, then soak tower
- After soaking, stand still — you're done
Beta Players
- Run opposite exit to break tether
- Then run opposite exit again to soak a tower
- Final step: sprint out before the final crush
Chronological Flow
- Boss drops 4 blobs
- Cruel Coil pulls everyone to the center
- Alpha 3 & 4 soak blobs
- Alpha 1 breaks → Beta 1 runs opposite → Tower → Beta 3 soaks
- Alpha 2 breaks → Beta 2 opposite → Tower → Beta 4 soaks
- Alpha 3 breaks → Tower → Beta 1 soaks
- Alpha 4 breaks → Tower → Beta 2 soaks
- All Betas escape exit
Splattershed: Moderate raidwide
- Mitigate
- Boss arms explode → dragon arms form
Grotesquerie: Act 3
Growth Mechanics
- Growth direction is fixed
- Start by pointing growth toward the center
- Move opposite growth to the cardinals
Each cardinal has 1 Support and 1 DPS
Floor Break Patterns
- Either cardinals or intercardinals are safe
- Identify by checking AoE at the four-way marker
Cardinal Safe
- Stay cardinals
- Spread adjustments to avoid overlap
- Bind → towers fire between partners
Intercardinal Safe
- Everyone rotates in the same direction (clockwise)
- Supports bottom-left, DPS top-right
- Towers fire in a rotation pattern
Correct positioning ensures towers are caught cleanly.
Dragons & Curtain Call
The platform depends on the previous safe pattern.
Cardinal Platform
Dragons Spawn
- Tanks bait busters diagonally north
- Heavy mitigation recommended
Follow-up
- Dragon's fire spreads to the furthest players
- Tanks move middle, melees near the wall
Curtain Call
- Similar to Act 1
- 5 puddles instead of 4
- Purple spreads must be hit by cleave
- Yellow spreads avoid cleave
- Heavy mitigation required
Afterwards:
- Alpha tethers break
- Supports left / DPS right
- Dodge blobs
Intercardinal Platform
- Tanks bait busters north corners
- Fixer → stack
- Puddles loop counterclockwise NW
- Identify who must be hit by the cleave
- Spread freely inside the cleave if required
After spreads:
- Rush safe zones
- Heal through Splattershed
Mortal Slayer (Repeat): Exactly the same as the first occurrence.
Slaughtershed (Final Mechanics)
Positioning
- Supports slightly north of the hitbox arrow
- DPS on or slightly south
Resolution Rules
- Safe spots: Northern corners
- Stack goes to the corner with blob
- Spreads go to the empty corner
Dragon heads:
- Half-arena cleaves
- Dodge right → then left
Second Slaughtershed
- Roles swap (supports stack, DPS spread)
- Regrown arms cause knockbacks
- Knockbacks alternate sides
- Use knockback immunity if available
Final Slaughtershed
- Same pattern again
- Execute cleanly
Enrage
If the boss is not pushed low enough:
- Becomes untargetable
- Instant party wipe
If the boss reaches 0% before Refreshing Overkill completes:
- Phase transition
- The fight is cleared