Black Temple has nine bosses, but only a few usually become real progression walls. Early encounters mostly test clean execution, while Teron Gorefiend, Reliquary of Souls, Gurtogg Bloodboil, Illidari Council, and Illidan demand much tighter assignments and faster reactions.
This guide skips general raid preparation and focuses on what actually gets bosses killed: positioning, target priority, interrupts, tank transitions, and the mechanics every player must execute correctly.
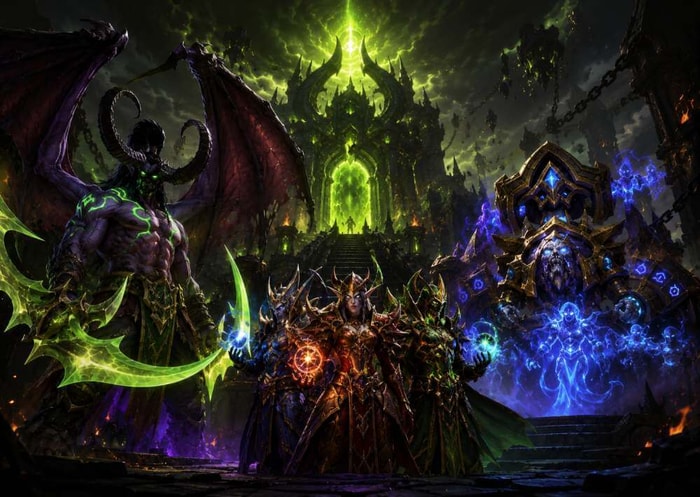
🔥 Illidan Stormrage
Illidan is the most complete execution check in Black Temple. The key is not maximizing DPS in every phase—it is entering each transition with the raid alive and the arena under control.
Phase 1: Control Shear and Parasites
Tank Illidan where he starts and face him away from the raid.
Shear is the tank-defining mechanic. It reduces maximum health by 60% if it lands and cannot miss, but it can be blocked, dodged, or parried. A Warrior or Paladin tank should build enough combined avoidance and block to prevent it from connecting.
Move Illidan slightly whenever Flame Crash creates fire under him.
Players with Parasitic Shadowfiend move to a preset drop point away from the raid. Kill the two parasites immediately after they spawn so they cannot infect another player.
Phase 2: Flames of Azzinoth
At 65%, Illidan throws down his Warglaives and spawns two Flames of Azzinoth.
Each Flame needs its own Fire Resistance tank.
The most important rule:
Keep every Flame within roughly 25 yards of its Warglaive.
Moving farther triggers Uncaged Wrath, greatly increasing its damage and usually ending the attempt.
Tanks move gradually as Blaze fills the floor. Ranged players spread so Fireball splash does not hit multiple players, and everyone adjusts quickly when Eye Beam crosses the room.
Do not chase melee uptime through fire. Clean Flame positioning is the real DPS check.
Demon Form and Final Phase
When Illidan enters Demon Form, melee move out, and a Shadow Resistance Warlock tanks him from range.
Spread for Flame Burst.
When Shadow Demons spawn, switch instantly. Each demon locks onto a player and kills that target if it reaches them.
Below 30%, Maiev joins the fight and provides Cage Traps. Use a trap when Illidan enrages; trapping him removes the immediate danger and creates a strong damage window.
Even at low health, continue handling Parasites and Flame Crash properly. Most final-phase wipes come from players deciding the fight is already over.
🧙 Illidari Council
Council is less about raw damage and more about running four assignments at once.
The bosses share health, but each one requires separate control.
Keep Malande Locked Down
Lady Malande is the most important control target.
Apply Curse of Tongues and assign two interrupters. A strong setup is one physical interrupter plus a Shaman, because when Malande is protected by Blessing of Protection, physical interrupts cannot stop her casts, but magical interrupts still can.
Circle of Healing Must Not Go Through
Week 1 groups should keep Malande slightly separated instead of trying to cleave everything together. Her Reflective Shield can punish aggressive cleave and create unnecessary healer pressure.
Control the Other Three
Gathios is usually the stable primary DPS target. Move him whenever Consecration fills the current area.
Veras periodically Vanishes. His threat resets when he returns, so the assigned tank must pick him up immediately. Players hit by Deadly Poison need extra healing before Envenom follows.
Zerevor should be tanked at range by a Mage using Spellsteal. Keep him away from the raid so Arcane Explosion and ground effects do not overlap the main group.
Think of Council as:
interrupt Malande → reposition Gathios → reacquire Veras → isolate Zerevor.
If those four jobs remain stable, the shared health pool eventually disappears.
For broader raid-planning advice beyond individual boss mechanics, including how to make both Hyjal and Black Temple progression smoother, check out our TBC Phase 3 raiding guide.
😈 Reliquary of Souls
Reliquary is three completely different encounters chained together.
Essence of Suffering
Healing is disabled, and armor/defense are effectively removed.
The Essence attacks the closest player, so use that deliberately.
Let the first tank hold Fixate until health becomes dangerous, then have the next tank step closer and take over. If another emergency rotation is needed, an avoidance-heavy Rogue can briefly use Evasion.
Dispel Soul Drain immediately.
Essence of Desire
This is an interrupt and self-control phase.
Spirit Shock must be interrupted every time.
Assign a rotation rather than relying on random reactions.
When Rune Shield appears, a Mage should Spellsteal it immediately. The shield absorbs damage and prevents reliable interrupts while active.
Deaden dramatically increases damage taken and can be Spell Reflected by the tank.
Meanwhile, Aura of Desire reflects part of your damage back to you. Watch your own health; stopping DPS for a moment is better than killing yourself during a burst window.
Essence of Anger
Save Heroism/Bloodlust for this phase.
Raid damage increases continuously, but threat is equally dangerous. Let the tank establish control before everyone unloads cooldowns.
Prepare healing for players targeted by Spite, then finish the boss before Aura of Anger becomes unsustainable.

👻 Teron Gorefiend
Teron becomes easy only when every player knows the ghost mechanic before being selected.
Shadow of Death kills the affected player after 55 seconds and turns them into a Vengeful Spirit while four Shadowy Constructs spawn.
Do not run out immediately. Continue DPS until roughly 10–15 seconds remain, then move to the assigned back corner. This gives the Constructs the longest possible path toward the raid.
Once dead, use:
Spirit Volley → Spirit Chains → Spirit Lance → Tab → Spirit Lance → Tab → Spirit Lance
Chains controls the pack, Volley damages them together, and Lance slows individual Constructs.
Do not tunnel one target while the other three escape.
The living raid stays well away from the ghost area and dispels Incinerate quickly.
Teron is not a hard boss mechanically; he is a test of whether the randomly selected player knows exactly what to do.
🩸 Gurtogg Bloodboil
This fight becomes much simpler when the Bloodboil rotation is automatic.
Divide 15 ranged players and healers into three groups of five.
| Bloodboil Cast | Group Farthest Away |
| 1 | Group 1 |
| 2 | Group 2 |
| 3 | Group 3 |
| 4 | Group 1 again |
The active group moves clearly farther away than everyone else, receives Bloodboil, then returns while the next group rotates out.
Do not rely on tiny positioning differences.
Tank Transition
Gurtogg applies Acidic Wound, reducing armor as it stacks.
Start preparing the transition around 7–8 stacks and avoid going beyond roughly 10 when possible.
Importantly, Gurtogg cannot simply be taunted for a normal tank swap. The active tank must control threat and allow the next tank on threat to take over.
Fel Rage
During Fel Rage, one player becomes Gurtogg's target and receives huge defensive and offensive bonuses.
Healers immediately commit to that player.
Use class-specific survival tools:
Rogue: Evasion
Druid: Bear Form
Paladin: shield and self-healing
Shaman: equip a shield if appropriate
Do not Ice Block or Feign Death, because dropping the Fel Rage interaction can destabilize the phase.
Everyone else spreads from the target and uses the threat-free window to push damage.
Players who are still catching up on an alt, completing key progression steps, or trying to get a raid-ready character into Phase 3 content faster can also use a WoW TBC boost to reduce the time spent on repetitive progression outside the raid.
🌑 Mother Shahraz
Mother Shahraz is primarily a movement test.
Three tanks stack in front of her to absorb Saber Lash, while the raid stays behind or beside her.
The fight revolves around Fatal Attraction.
Three players are teleported together and take increasing Shadow damage while close to one another.
The response must be immediate:
Teleport → split in three different directions.
Do not wait to see where the other two players move.
Shadow Resistance gives the raid more room for error, but it does not replace correct movement. If you still need resistance pieces, enchants, gems, or other raid upgrades for this encounter, you can buy TBC Anniversary gold to cover those in-game costs more easily.
⚔️ High Warlord Naj'entus
Naj'entus is about timing the shield break correctly.
When Impaling Spine hits a player, another raider clicks the spine to free them and keeps the recovered spine.
When Naj'entus casts Tidal Shield, stop DPS and let healers top the raid.
Only then should the assigned player throw the spine.
Breaking the shield triggers roughly 8,500 raid-wide damage, so an early break can instantly kill players who were not topped.
The fight rhythm is simple:
Free impaled player → save spine → heal raid → break shield.
🔥 Supremus
Supremus alternates between a 60-second tank phase and a 60-second movement phase.
During Phase 1, keep Hateful Strike tanks healthy and move away from Molten Flame.
During Phase 2, Supremus Fixates random players.
If he selects you, run immediately—but do not kite excessively far away, because moving beyond roughly 40 yards can trigger his charge. Avoid Volcanic Geysers by giving them more space than their visual size suggests.
When Phase 2 ends, threat resets. DPS should wait for tanks to regain control.
👤 Shade of Akama
Shade of Akama is the simplest encounter and should be treated as an objective fight rather than an add-cleave contest.
Kill the six Channelers holding the Shade.
Then prioritize incoming Sorcerers because their channel slows the Shade's movement toward Akama.
Once the Shade is free and reaches Akama, commit damage and finish it quickly.
Do not waste time evenly killing every low-priority add. The only question that matters is:
Does this target help free or slow the Shade?
If not, tanks can manage it while DPS handles the real objective.
✅ The Difference Between Knowing Black Temple and Clearing It
Black Temple mechanics are not especially difficult once written down. What wipes raids is hesitation.
Teron players must know their ghost buttons before Shadow of Death selects them. Bloodboil groups must rotate without waiting for repeated calls. Reliquary interrupters must know exactly which cast they own. Council players must keep their individual assignments working even while the floor becomes messy. Illidan players must stop tunneling the boss whenever Flames, Parasites, or Shadow Demons become the real priority.
Make those reactions automatic, and Black Temple becomes far more predictable—even before your raid is fully equipped with Phase 3 gear.
You May Also Like:
TBC Phase 3 Gold Farming Guide: Best Spots & Profitable Materials
TBC Phase 3 Epic Gems Guide: How to Get Gems & Prepare for Tier 6
TBC Phase 3 Tier 6 Loot Priority: Best Classes & Who Gets T6 First?