Withered Knight is one of the strongest melee options in Mistfall Hunter for players who prefer a reliable solo playstyle. While Great Sword offers more mobility and burst potential, the Polearm + Shield setup provides better control, survivability, and consistency during difficult encounters.
This Withered Knight Solo Build focuses on controlling enemies, creating safe damage windows, and winning longer fights through defensive skills and powerful counter-attacks.
If you are looking for a beginner-friendly but high-performance Withered Knight setup, this guide covers the recommended weapons, skills, talents, affixes, and combat rotation.
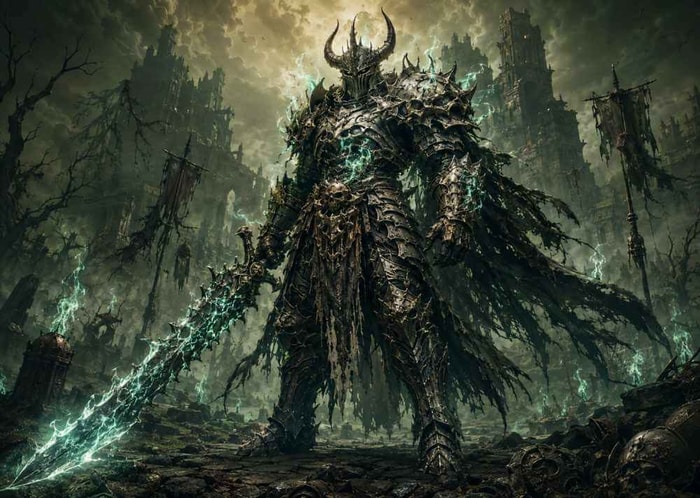
Best Withered Knight Solo Build Overview
The following setup is designed for solo players who want a balanced combination of defense, damage, and crowd control.
| Category | Recommended Choice |
| Main Weapon | Polearm + Shield |
| Secondary Weapon | Great Sword |
| Playstyle | Defensive Counter & Crowd Control |
| Core Skills | Javelin Thrust, Breaker Shield Bash, Sacred Bulwark |
| Main Affixes | Vitality, Elusive, Valor |
| Combat Focus | Stun enemies, create openings, punish safely |
Building a new character often requires a large amount of resources for upgrades and progression. Players who want to spend more time testing their Withered Knight build and less time farming can get Mistfall Hunter Gyldenblod to speed up their character progression.
Best Weapon Setup for Withered Knight
Main Weapon: Polearm + Shield
Polearm and Shield should be your primary weapon combination.
Compared with Great Sword, this setup gives Withered Knight:
Better survivability during close-range fights
More reliable crowd control
Safer openings for combos
More consistent solo performance
The goal of this build is not to trade damage directly with enemies. Instead, you control the fight, reduce incoming threats, and punish enemies when they are vulnerable.
Secondary Weapon: Great Sword
Great Sword is still useful, but it works better as a utility weapon rather than your main damage source.
Use it mainly for:
Closing distance quickly
Additional movement options
Reaching enemies when your main skills are unavailable
After entering combat, switch back to Polearm + Shield for most situations.
Best Withered Knight Skills
Javelin Thrust
Javelin Thrust is your main engage tool.
Use it to:
Start fights safely
Apply pressure from a short distance
Prepare your crowd control combo
With the correct talents, Javelin becomes one of your strongest tools for creating guaranteed damage opportunities.
Breaker Shield Bash
Shield Bash is the core skill of this build.
It provides:
Enemy control
Combo setup
Defensive value
The purpose of Shield Bash is not only damage. It creates the opening you need to continue your attack sequence without taking unnecessary risks.
Sacred Bulwark
Sacred Bulwark improves your ability to survive dangerous situations.
Because Withered Knight fights in melee range, this skill helps you stay active during extended battles and recover from mistakes.
Best Withered Knight Talents
Use the following talent setup for the Polearm + Shield Solo Build:
| Talent Group | Recommended Talents |
| Weapon Specialization | Polearm Specialization, Shield Specialization |
| Shield Combat | Rising Morale, Momentum Shift, Shield Wall Slam |
| Javelin Control | Javelin Heavy Kick, Javelin Stun |
| Shield Punch | Offbalance, Focus |
Why These Talents Work
Shield Wall Slam
This is one of the most important talents for this build.
It improves your Shield Bash gameplay by allowing you to continue pressure after creating an opening.
Your basic pattern becomes:
Shield Bash → Create advantage → Follow with attacks → Reset safely
Javelin Heavy Kick & Javelin Stun
These talents create Withered Knight's strongest control combo.
After hitting an enemy with Javelin:
Push the enemy toward a wall
Trigger the stun effect
Use your damage combo while they cannot respond
The stun window allows you to deal damage safely against stronger enemies.
Offbalance & Focus
These talents improve Shield Punch by adding more control.
They help with:
Slowing enemies
Increasing effective range
Reducing enemy dodge distance
This makes it easier to maintain control against mobile opponents.
Best Withered Knight Affix Priority
Withered Knight benefits more from balanced defensive stats than pure damage stacking.
Follow this upgrade order:
| Priority | Affix | Reason |
| 1 | Vitality | Improves survival and allows longer melee fights |
| 2 | Elusive | Provides better defensive consistency and avoidance |
| 3 | Valor | Adds additional combat power after your defense is established |
Your first goal should be:
Vitality Level 5
Elusive Level 5
Valor Level 5
After reaching these three, you can customize the remaining affixes based on your preferred playstyle.
Players who want safer runs can continue investing in defensive options, while experienced players can move toward more aggressive stats.
Withered Knight Solo Combat Rotation
The biggest difference between an average and experienced Withered Knight player is how they use their control skills.
Follow this basic rotation:
Step 1: Start With Javelin Thrust
Use Javelin to create the first opening and control enemy positioning.
Step 2: Force the Enemy Into a Wall
Position enemies near walls whenever possible.
This allows Javelin talents to activate the stun effect.
Step 3: Use Shield Bash
After the stun or opening:
Use Breaker Shield Bash
Continue your combo
Maintain control
Step 4: Use Defensive Skills When Needed
Do not save defensive abilities until you are nearly defeated.
Withered Knight performs best when you prevent damage before it happens.
Great Sword vs Polearm + Shield: Which Should You Use?
Great Sword is not a bad option. It can feel faster and provides useful mobility.
However, for most solo players:
Polearm + Shield is the more consistent choice.
It offers:
Safer fights
More control
Better mistake recovery
Stronger solo reliability
Great Sword is better used as a secondary option for movement rather than replacing your main setup.
Final Thoughts
Withered Knight is not the easiest class to master, but its strong defensive tools and control-focused playstyle make it a reliable choice for solo players. Once you learn the timing of your abilities and positioning, this build can handle challenging encounters with much greater consistency.
Related Links:
Best Ways to Find, Farm & Earn Gyldenblod Fast in Mistfall Hunter
Mistfall Hunter Gyldenblod Launch Tier List: The Best Class for New Players