In Dune: Awakening, your base is more than just a shelter from the sandworms and the sun; it's the industrial heart of your operation. A smart build saves resources, accelerates your tech tree, and sets the stage for farming massive amounts of Dune Awakening Solari and high-tier Dune Awakening Items. Too many players waste precious Granite and Salvaged Metal sealing off four full walls, only to run out of mats before their Refineries are even online.
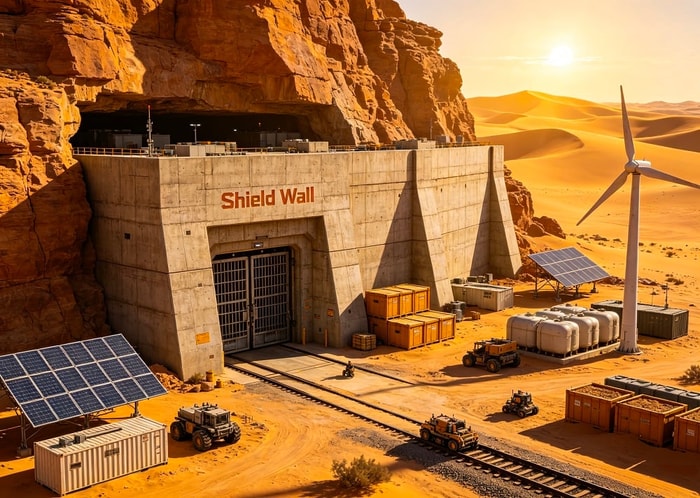
This guide breaks down a high-impact, low-cost construction method: the Cliff-Embedded Neo-Brutalist Bunker located in the Eastern Shield Wall. By leveraging the natural terrain, you can build a visually stunning, multi-layered fortress that looks like a high-budget cinematic set while functioning as a lean, mean, resource-generating machine.
1. Location Strategy: Why the Eastern Shield Wall?
The Eastern Shield Wall in Hagga Basin offers a unique geological advantage. Specifically, look for a natural gap between two large rock formations.
• The "Three-Wall" Advantage: Since the rock face covers your back and sides, you only need to build the front facade, the interior floors, and the roof. You save roughly 50% on foundational building materials.
• Strategic Resource Access: This area typically offers proximity to Dew Collectors, Aluminum nodes, and Basalt. More importantly, being near trade hubs allows for quick liquidation of inventory, turning raw materials into Dune Awakening Solari with minimal downtime.
• Defensive Security: In PvE zones like Hagga Basin, the natural rock barrier prevents Flies (human NPCs) and wildlife from pathing around to your rear. You only need to fortify the front entrance.
2. Architectural Philosophy: Neo-Brutalism
Inspired by modern Brutalist architecture, this design focuses on "honest" materials—specifically, large prefabricated Concrete Plates and blocks. Instead of hiding the structure, we celebrate the raw, industrial aesthetic of Arrakis.
Core Design Principles (From the Build):
• Variable Thickness: Do not use the same wall thickness for every level. Alternate between thick load-bearing slabs and thinner decorative panels. This creates visual depth and prevents the build from looking like a generic storage crate.
• Variable Widths: Use a rhythm of widths: 3-wide sections, followed by 2-wide, 1-wide, and even half-width protrusions. This staggered layout breaks up the monotony of a flat wall.
• Horizontal vs. Vertical: Start with strong horizontal lines embedding the base into the mountain. Once the horizontal framework is established, introduce vertical accents (pillars or narrow fins) to break the "heavy slab" look.
• Asymmetrical Flooring: Abandon the idea of a single, central staircase. Instead, design unique floor shapes for each level. Floor 2 shouldn't necessarily align with Floor 1. This creates an "abstract" interior that feels organic and complex.
3. Step-by-Step Construction Guide
♦ Phase 1: Foundation & Hangars
• Place your Sub-fief Console in the gap. Extend your claim boundaries forward to accommodate a landing pad for your Ornithopter.
• Ground Level: Lay down your foundation tiles extending outward. Since the back is against the wall, focus on the front. This level should house your Hangars. In the reference build, three distinct garage-style doors were used. Ensure the ceiling height is sufficient for vehicles.
• Material Choice: Use heavy, dark concrete textures for the base to ground the structure visually.
♦ Phase 2: The Staggered Stack
Move to the second level.
• Offset Placement: Place the second floor so it overhangs or recedes from the first floor by one tile.
• Independent Stairs: Instead of one main staircase, use short, functional staircases or ladders to connect levels. This allows each floor to have its own unique footprint.
• Deep Recesses: Push interior rooms deep into the rock. This creates dramatic shadows and makes the base feel larger than it is.
♦ Phase 3: Interior & Utility Layout
The interior should reflect the "industrial-chic" vibe.
• Ground Floor: Refineries, Storage Chests, Water Cisterns, and Generators. Keep the heavy machinery near the entrance for easy unloading.
• Mid Levels: Fabricators, Weapon Benches, and Research stations. Use the "half-width" sections for small, private quarters or storage nooks.
• Top Floor: The "Penthouse." Often, the simplest part of the build features a viewing deck overlooking the desert.
♦ Phase 4: Finishing Touches
• Roofing: Use thick concrete slabs. Add a railing for your rooftop Dew Collectors.
• Lighting: Use Strip Lights to emphasize the horizontal lines of the concrete plates. Cool white lighting enhances the Brutalist aesthetic.
• Defense: Place Auto-Turrets at the corners of your front facade to cover the approach.
4. Optimizing for Profit: Solari and Item Farming
A base built on these principles isn't just for show; it's a logistics hub designed to flood your inventory with wealth.
• Industrial Scaling: Because you saved resources on walls, reinvest those materials into multiple Refineries. Process raw ores into components at your base, then sell the finished goods at Trade Posts for maximum Dune Awakening Solari.
• Proximity to Test Stations: The Eastern Shield Wall is a short flight from numerous Test Stations. Use your base as a staging ground to clear these POIs for rare schematics and high-value Dune Awakening Items.
• Water Independence: Mounting Dew Collectors on your flat roof ensures a passive supply of water, critical for crafting and survival, reducing the need for risky expeditions.
• Logistics Hub: With a three-hangar setup, you can maintain a Buggy for mining, a Scout Ornithopter for scouting spice blows, and a Carrier for deep desert runs.
5. Common Pitfalls & Advanced Tips
• The 90% Refund: Don't be afraid to experiment. Dune: Awakening features a generous 90% material refund on demolition. If a floor looks "off," tear it down and adjust the angle or thickness.
• Structural Integrity: Ensure overhangs are supported by pillars or thick support beams, especially on the lower levels, which bear the most weight.
• Deep Desert Warning: This elaborate build is for the Hagga Basin (PvE). In the Deep Desert (PvP), structures are wiped weekly by the Coriolis Storm. Save the Brutalist masterpiece for your home base and use cheap, disposable shacks in the endgame.
By following this guide, you'll construct a base that is both a fortress and a factory. You'll conserve resources, accelerate your progression, and establish a dominant presence on Arrakis. Now get out there, claim that cliffside, and start stacking that Solari!