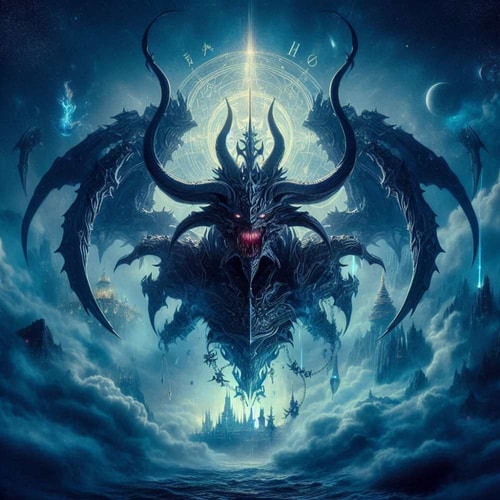
In World of Warcraft’s Manaforge Omega Raid, one of the most challenging encounters players will face is Dimensius, a multi-phase boss that tests coordination, movement, and raid-wide survivability. The fight alternates between platform phases and intermissions, where players must mount dragons to travel between arenas. How to defeat it? Automatic-Jak shared a mechanics guide on his YouTube channel, including a breakdown of each phase and what to expect on both Normal and Heroic difficulties. And if you ever need extra help progressing in the game, our professional WoW power leveling services can save you time and let you enjoy more of the game.
Phase One
At the start of the fight, players travel through rushing gateways (once requiring cloaks in earlier content) and immediately engage with Living Mass adds. These adds are critical, as killing them produces Excess Mass, which players can collect to form Collective Gravity.
Collective Gravity vs. Devour
Dimensius periodically casts Devour when reaching maximum energy. Collective Gravity shields the raid from this mechanic. However, each Devour increases the boss’s Growing Hunger, requiring progressively more gravity to survive later casts.
Add Management
- Dimensius begins with two Living Mass adds. Killing them provides enough gravity to survive the first Devour.
- By the third Devour, the raid will need to gather all remaining Excess Mass and stack together to withstand the ability.
Key Abilities
- Massive Smash: Spawns Living Mass adds and applies Mortal Fragility to tanks, increasing physical damage taken by 100%. Tanks must swap.
- Dark Matter: Targets random players with circles. On Normal, spread out to avoid overlap. On Heroic+, pools of dark energy remain at impact locations, so place them at the edges of the room.
- Reverse Gravity: Debuffs players and pulls them into the air toward the boss. Players must soak their tether to descend safely. Anyone dragged into the boss is instantly killed.
- Shattered Space: Both sides of the arena spawn antimatter circles. Players must soak to reduce the explosion’s damage. This is a heavy damage check requiring raid-wide defensives and healing cooldowns.
Intermission
When Dimensius reaches 0 HP in Phase One, the boss casts Event Horizon, beginning the intermission.
- Players gain the Soaring Reshii buff, mount up, and fly between platforms.
- Missing a ring removes the buff, causing instant death.
- Avoid laser beams, asteroids, and debris while traveling.
- The intermission ends with the raid landing on one of two platforms to begin Phase Two.
Phase Two
Two Voidlords appear on separate platforms, forcing the raid to split. Each lord has unique abilities alongside Dimensius’s ongoing attacks. The Voidlord mechanics include:
Artoshion
Mass Ejection: A frontal cone. On Heroic+, it leaves behind a permanent debris field. Tanks should aim this away from the group.
Pargoth
Stardust Nova: An AoE centered on the boss, also leaving a debris field on Heroic+. Tanks must carefully position the boss to avoid blocking paths.
Shared Abilities
- Conqueror’s Cross: Summons four Voidwardens in a cross formation, restricting movement. Kill the vertical (north-south) Warden first to allow lateral dodging.
- Extinction: Dimensius smashes a huge portion of the platform with his arm. Raiders must dodge left or right depending on his animation.
- Gamma Burst: A knockback effect by Dimensius. Players may need speed boosts, Warlock gateways, or clear vertical space from the cross to resist the push.
- Null Binding (Heroic+): Additional mob that slows players and applies a stacking debuff. This is a priority kill.
Once both Voidlords are defeated, the raid advances to Phase Three.
Phase Three
At the start of this phase, Dimensius becomes destabilized for 15 seconds, taking 50% increased damage. The key mechanics of this phase include:
Voidstars & Black Holes
- The boss summons eight Voidstars. Over time, they go Supernova, transforming into deadly Black Holes. Touching a black hole results in instant death.
- Standing within a Voidstar’s gravity field protects against Devour, but deals ticking damage. Major healing cooldowns are required.
Darkened Sky
- Expanding shadow circles (shadow halos) spread across the platform.
- Players must stagger movement to avoid stacking debuffs that increase subsequent halo damage by 300%.
Cosmic Radiation
A stacking raid-wide DoT that increases throughout the fight. Healing intensifies over time.
Voidgrasp
Random players are afflicted with a heavy DoT and a 50% movement slow for 8 seconds. Requires focused healing.
Cosmic Collapse (Tank Mechanic)
Applies Cosmic Fragility, forcing a tank swap. On Heroic+, it also pulls players inward, requiring movement skills or use of Voidstar’s gravity wells to resist.
Final Burn
Phase Three is a race against time. After surviving two Devours, the third becomes a hard enrage as no Voidstars remain. Shadow halos and collapsing space make movement increasingly difficult. Use externals and mobility tools to keep key players alive for the kill.
Conclusion
The Dimensius encounter demands strong coordination between tanks, healers, and DPS, especially in add management, Voidlord positioning, and survival mechanics in Phase Three. With proper execution and cooldown planning, your raid can bring down this cosmic menace.