Echo of Mephisto is one of the most punishing endgame fights in Diablo 4, especially on Torment 12. However, you do not need an immortal build, perfect gear, or enough damage to skip every mechanic.
Once Mephisto appears, stop treating the encounter as one long damage race. Remove roughly one-third of his health, disengage before the dangerous mechanic begins, survive the pattern, and then reposition behind him.
Remember one rule:
Deal one-third, move away, and repeat.
⚔️ The Core T12 Strategy
| Phase | Main Test | Safest Approach |
|---|---|---|
| Phase 1 | Damage and toughness | Stay at Akarat’s side or behind him and check whether your build can survive the opening phase safely |
| Phase 2 | Discipline | Remove roughly one-third of his health, retreat, survive the next mechanic, and repeat |
| Phase 3 | Positioning | Circle behind Mephisto and attack only during safe windows |
This method is slower than a one-shot kill, but it is much more consistent. Most failed attempts happen because players keep attacking after a safe damage window has ended.
Blizzard continues to adjust classes and boss encounters through live updates, so check the official Diablo IV patch notes for any late-season changes before attempting T12.
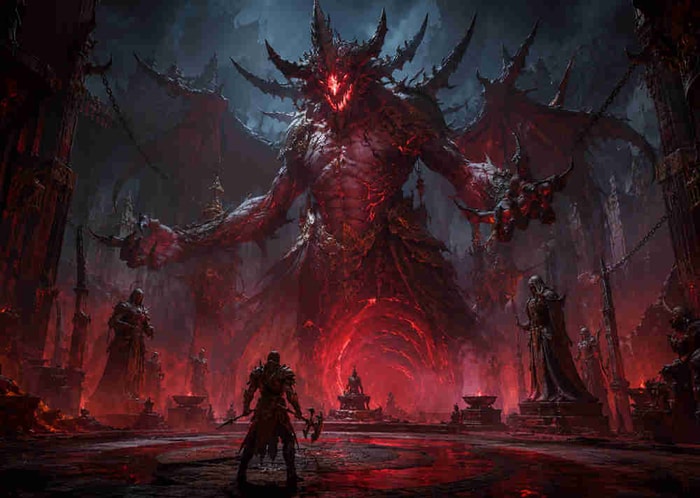
🛡️ Prepare Before the Fight
T12 still requires a functional endgame build. Mechanics can compensate for imperfect gear, but they cannot completely replace damage, toughness, or recovery.
Bring one reliable mobility skill, a defensive cooldown, dependable healing, and another defensive layer such as Barrier, Fortify, or damage reduction. Movement and survival are more valuable here than a small increase in sheet damage. If your setup still lacks boss damage or survivability, review the best Diablo 4 Season 14 builds to find stronger bossing options for your class.
Use Phase 1 as your readiness test. Finishing it in around 20 seconds is a useful sign that your build is prepared, although this is only a practical benchmark. If Akarat’s regular attacks nearly kill you or the phase takes several full mechanic cycles, improve your build or practice the fight on a lower Torment tier first.
1️⃣ Phase 1: Use Akarat as a Build Check
You begin the encounter against the Echo of Akarat before Mephisto appears in his true form. Stay at Akarat’s side or behind him and deal steady damage without spending every defensive cooldown.
Keep enough room to escape and watch for sword barrages, beam attacks, and moving red circles. Stop attacking as soon as a large pattern begins rather than risking one extra skill cast.
Your goal is to finish this phase while keeping most of your potions, mobility charges, and defensive tools available. If you can do that while reducing Akarat’s health at a reasonable speed, your build is ready for the more mechanical Mephisto phases.
2️⃣ Phase 2: Split the Fight into Three Pushes
Phase 2 causes many deaths because players try to attack continuously. Instead, divide it into three controlled damage windows.
First Third
Attack immediately and use your main damage rotation. Once you remove roughly one-third of Mephisto’s health, stop and move away.
Keep moving while avoiding falling fire, poison waves, and moving red ground attacks. When Mephisto brings both hands forward to channel the Death Beam, move behind him and wait for it to end.
Second Third
Return only when the arena is safe. Deal another one-third of his health, disengage again, and repeat the same movement.
Do not get greedy. A few extra attacks are rarely worth losing the attempt.
Final Push
After the second retreat, use the next safe opening to push Mephisto toward his final quarter of health. At around 25% health, he teleports to the top of the arena and begins lifting red souls into the air. Use this as a burst window.
Back away as soon as the souls stop rising because a deadly spread of red lines follows. Dodge the barrage, then return during the next safe damage window instead of forcing the kill.
3️⃣ Phase 3: Stay Behind Mephisto
Mephisto is strongest in the final phase, but his large body also makes the safest position easier to identify. Stay directly behind him whenever possible.
Survive the Opening and Recover Your Skills
At the start of the phase, stay near the outer edge to avoid the expanding wave. Mephisto will also remove your abilities, but you can still use Evade while collecting the glowing white orbs that restore them.
Keep moving while recovering your skills, avoid the red puddles, and watch for the two collapsing walls of hands. Once your main damage and mobility skills are available again, circle behind Mephisto and begin your first controlled damage push.
Take the First Third
Once you reach his back, attack until you remove roughly one-third of his health.
When the giant heads form around the edge of the arena, stand in the gap between two of them. The heads then send red orbs toward Mephisto, signaling that the Omega Beam is about to begin.
Avoid the Omega Beam
As the heads finish sending red orbs toward Mephisto, move behind him immediately. He then fires a massive straight beam, so stay behind him and rotate with him until it ends.
Use the next safe window to remove roughly another third of his health.
Escape the Vortex
Mephisto will sink into the ground and become invulnerable. Keep moving away from the center while avoiding the inward-moving waves. Touching one can stun you and pull you toward the one-shot zone.
You will lose your abilities again during this mechanic, but Evade remains available. Keep an Evade charge ready to cross a dangerous gap, and do not waste time attacking while Mephisto is underground.
Once the pull ends, collect the glowing white orbs again to recover your abilities before returning to Mephisto.
Survive the Final Patterns and Finish
When Mephisto resurfaces, stay behind him or move to his side while avoiding the slow red tornadoes, frontal swipes, and swarming red orbs. Keep moving instead of forcing damage through these final attacks.
Once Mephisto begins glowing yellow, the mechanic-heavy part of the fight is over. Use your remaining cooldowns and finish him.
❌ Mistakes That Ruin Good Attempts
Avoid these common errors:
- Continuing to attack after a safe damage window has ended
- Using every mobility charge as part of the damage rotation
- Standing in a pool to finish one extra attack
- Returning too early during falling fire, the head sequence, the red-line barrage, or the Omega Beam
- Attacking while Mephisto is underground
- Fighting from the front when his back is available
The key change is simple: when the damage window ends, your job changes from attacking to surviving.
🏆 Final Mephisto T12 Plan
Phase 1: Test your build against Akarat, avoid the large attack patterns, and finish cleanly.
Phase 2: Take one-third, retreat, circle behind, and repeat.
Phase 3: Recover your skills, avoid the hand walls, attack from behind, stand between the heads, move behind Mephisto for the Omega Beam, escape the vortex, survive the final patterns, and burst him down when he glows yellow.
T12 Mephisto is not truly easy, but the fight becomes predictable once you stop overcommitting. Phase 1 checks your build, Phase 2 checks your discipline, and Phase 3 checks your positioning.
A controlled kill is better than another fast failed attempt. Deal one-third, move away, reposition behind Mephisto, and let his phase changes create your safest damage windows.